D I Y A N I TA
STEP-BY-STEP
INSTRUCTIONS
1 2
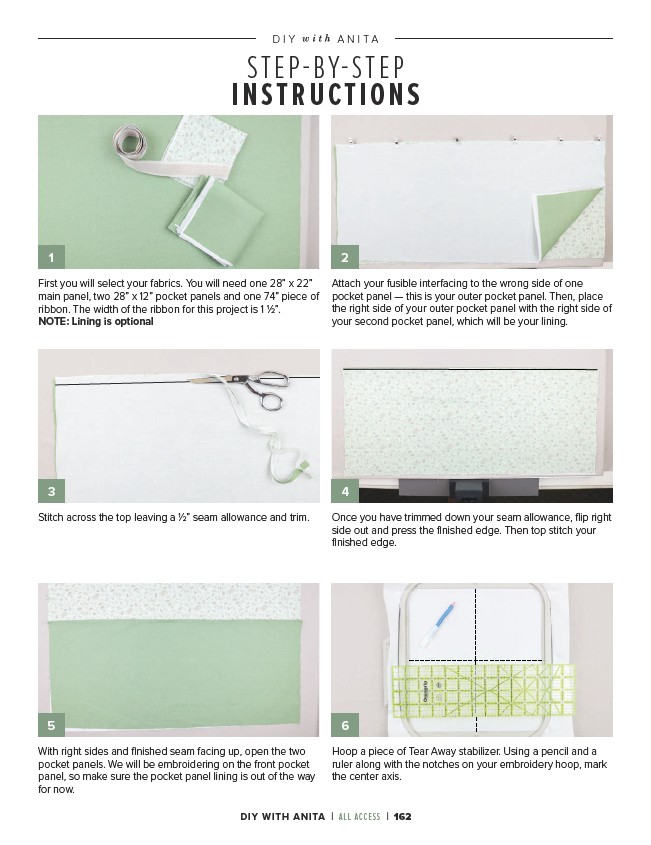
Attach your fusible interfacing to the wrong side of one
pocket panel — this is your outer pocket panel. Then, place
the right side of your outer pocket panel with the right side of
your second pocket panel, which will be your lining.
First you will select your fabrics. You will need one 28” x 22”
main panel, two 28” x 12” pocket panels and one 74” piece of
ribbon. The width of the ribbon for this project is 1 1⁄2”.
NOTE: Lining is optional
3 4
Stitch across the top leaving a 1⁄2” seam allowance and trim. Once you have trimmed down your seam allowance, flip right
side out and press the finished edge. Then top stitch your
finished edge.
5 6
Hoop a piece of Tear Away stabilizer. Using a pencil and a
ruler along with the notches on your embroidery hoop, mark
the center axis.
With right sides and finished seam facing up, open the two
pocket panels. We will be embroidering on the front pocket
panel, so make sure the pocket panel lining is out of the way
for now.
DIY WITH ANITA | ALL ACCESS | 162