13 14
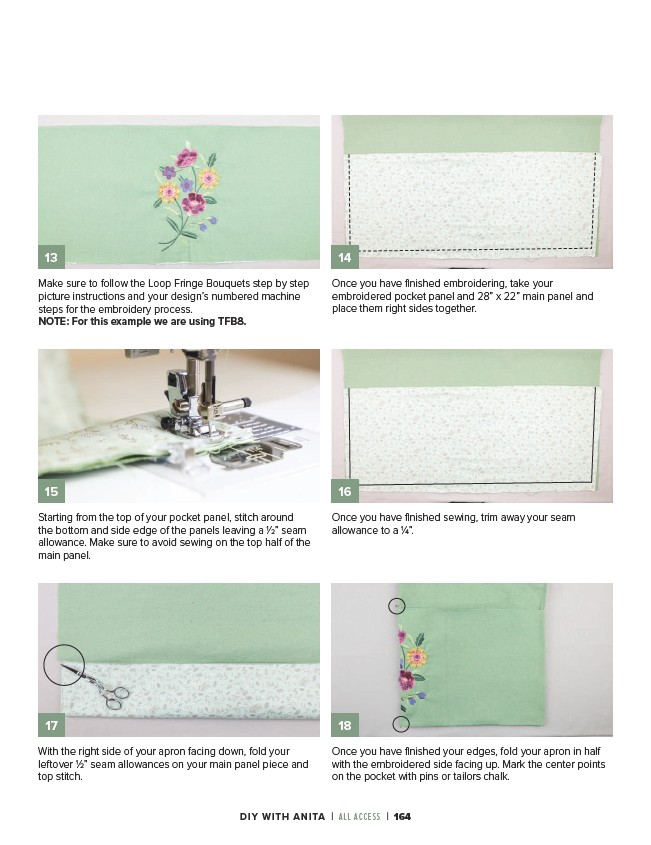
Once you have finished embroidering, take your
embroidered pocket panel and 28” x 22” main panel and
place them right sides together.
Make sure to follow the Loop Fringe Bouquets step by step
picture instructions and your design’s numbered machine
steps for the embroidery process.
NOTE: For this example we are using TFB8.
15 16
Starting from the top of your pocket panel, stitch around
the bottom and side edge of the panels leaving a 1⁄2” seam
allowance. Make sure to avoid sewing on the top half of the
main panel.
Once you have finished sewing, trim away your seam
allowance to a 1⁄4”.
17 18
With the right side of your apron facing down, fold your
leftover 1⁄2” seam allowances on your main panel piece and
top stitch.
Once you have finished your edges, fold your apron in half
with the embroidered side facing up. Mark the center points
on the pocket with pins or tailors chalk.
DIY WITH ANITA | ALL ACCESS | 164