CREATING YOUR TREE
Step by Step Instructions
A B
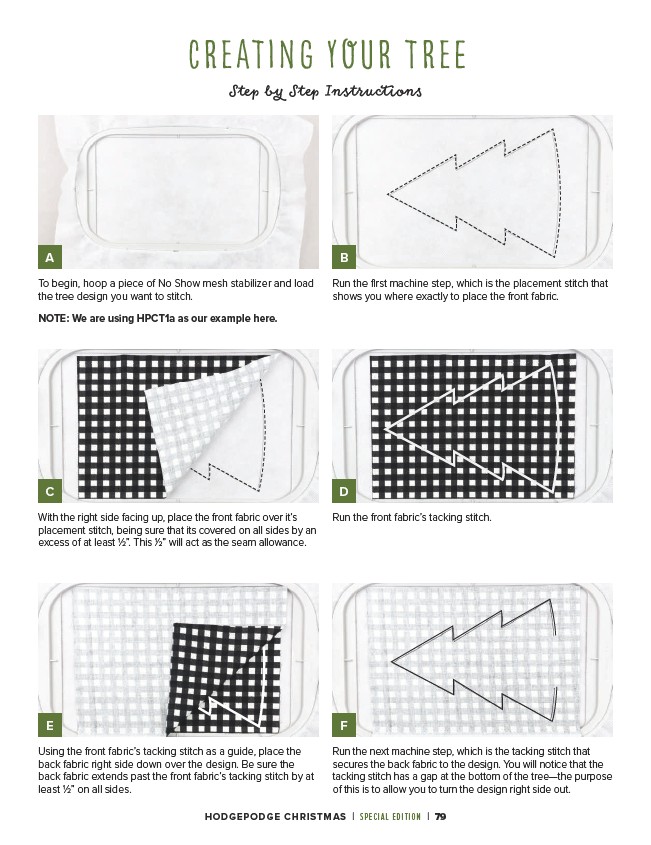
Run the first machine step, which is the placement stitch that
shows you where exactly to place the front fabric.
C D
With the right side facing up, place the front fabric over it’s
placement stitch, being sure that its covered on all sides by an
excess of at least 1⁄2”. This 1⁄2” will act as the seam allowance.
Run the front fabric’s tacking stitch.
E F
Using the front fabric’s tacking stitch as a guide, place the
back fabric right side down over the design. Be sure the
back fabric extends past the front fabric’s tacking stitch by at
least 1⁄2” on all sides.
Run the next machine step, which is the tacking stitch that
secures the back fabric to the design. You will notice that the
tacking stitch has a gap at the bottom of the tree—the purpose
of this is to allow you to turn the design right side out.
To begin, hoop a piece of No Show mesh stabilizer and load
the tree design you want to stitch.
NOTE: We are using HPCT1a as our example here.
HODGEPODGE CHRISTMAS | SPECIAL EDITION | 79