DESCRIPTIVE STEP-BY-STEP TITLE
STEP-BY-STEP INSTRUCTIONS
A B
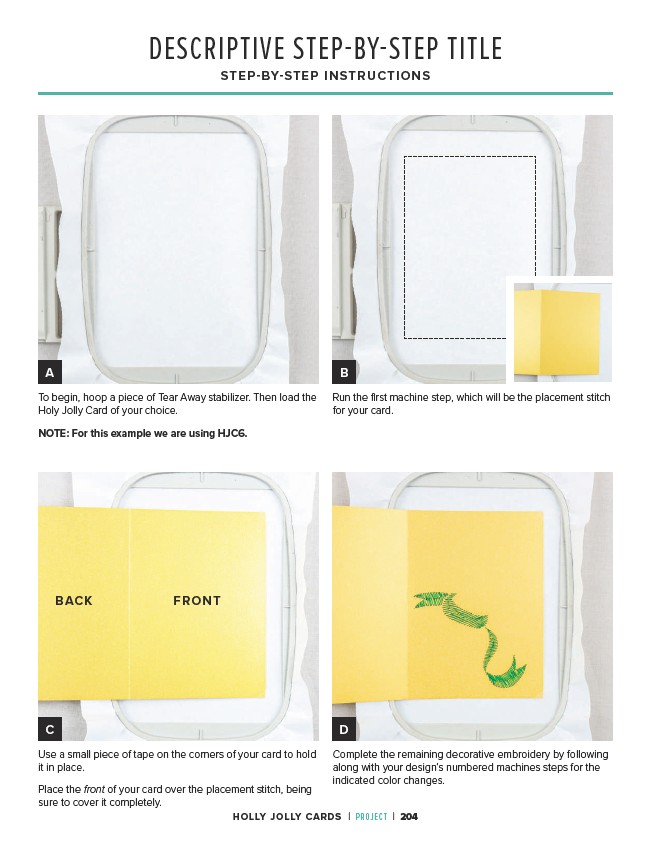
Run the first machine step, which will be the placement stitch
for your card.
C D
Use a small piece of tape on the corners of your card to hold
it in place.
Place the front of your card over the placement stitch, being
sure to cover it completely.
Complete the remaining decorative embroidery by following
along with your design’s numbered machines steps for the
indicated color changes.
To begin, hoop a piece of Tear Away stabilizer. Then load the
Holy Jolly Card of your choice.
NOTE: For this example we are using HJC6.
BACK FRONT
HOLLY JOLLY CARDS | PROJECT | 204