COZY COMFORT WRAP CONSTRUCTION
STEP-BY-STEP INSTRUCTIONS
A B
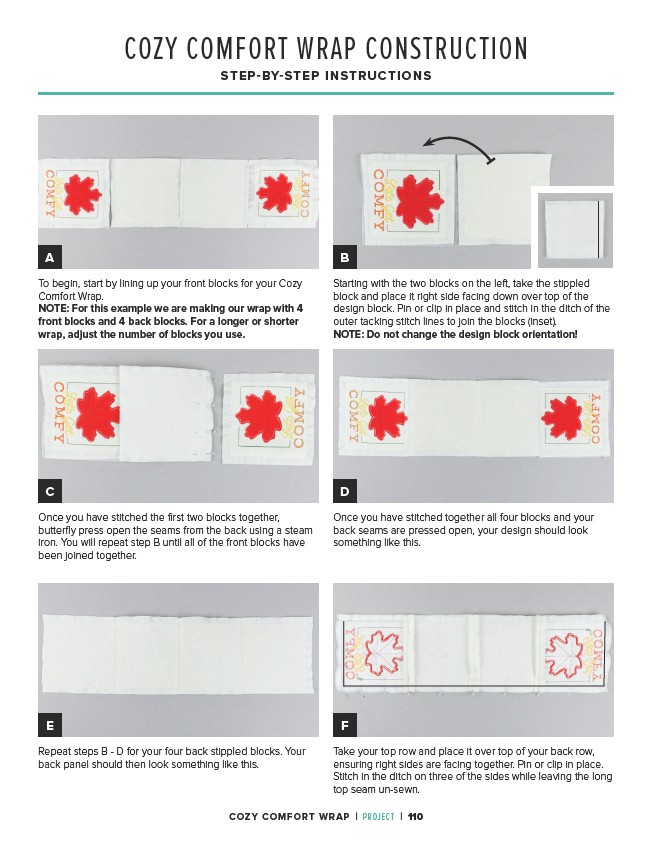
Starting with the two blocks on the left, take the stippled
block and place it right side facing down over top of the
design block. Pin or clip in place and stitch in the ditch of the
outer tacking stitch lines to join the blocks (inset).
NOTE: Do not change the design block orientation!
C D
Once you have stitched the first two blocks together,
butterfly press open the seams from the back using a steam
iron. You will repeat step B until all of the front blocks have
been joined together.
Once you have stitched together all four blocks and your
back seams are pressed open, your design should look
something like this.
E F
Repeat steps B - D for your four back stippled blocks. Your
back panel should then look something like this.
Take your top row and place it over top of your back row,
ensuring right sides are facing together. Pin or clip in place.
Stitch in the ditch on three of the sides while leaving the long
top seam un-sewn.
To begin, start by lining up your front blocks for your Cozy
Comfort Wrap.
NOTE: For this example we are making our wrap with 4
front blocks and 4 back blocks. For a longer or shorter
wrap, adjust the number of blocks you use.
COZY COMFORT WRAP | PROJECT | 110