STITCHING THE BACK
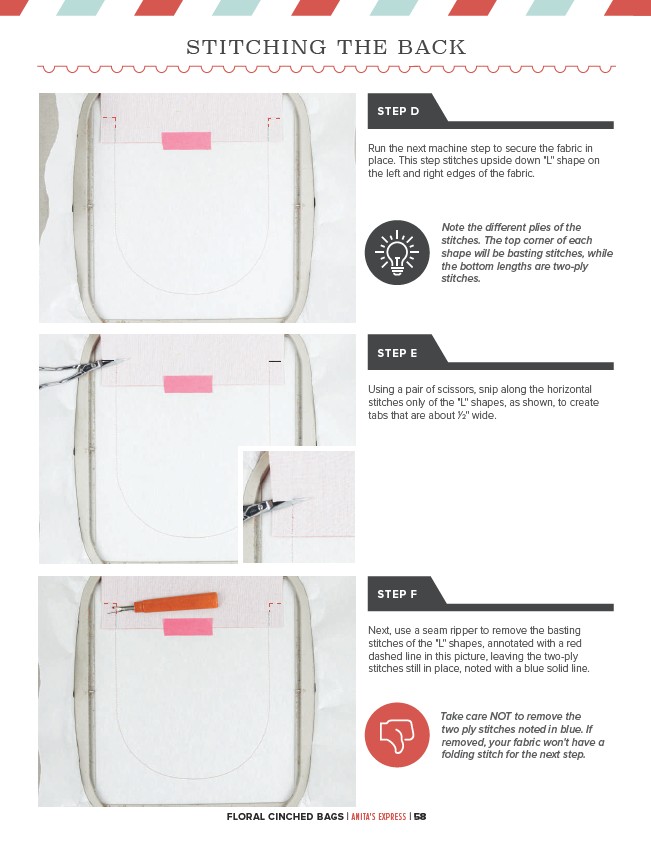
Run the next machine step to secure the fabric in
place. This step stitches upside down "L" shape on
the left and right edges of the fabric.
Using a pair of scissors, snip along the horizontal
stitches only of the "L" shapes, as shown, to create
tabs that are about 1⁄2" wide.
Next, use a seam ripper to remove the basting
stitches of the "L" shapes, annotated with a red
dashed line in this picture, leaving the two-ply
stitches still in place, noted with a blue solid line.
FLORAL CINCHED BAGS | ANITA'S EXPRESS | 58
Note the different plies of the
stitches. The top corner of each
shape will be basting stitches, while
the bottom lengths are two-ply
stitches.
STEP D
STEP E
STEP F
Take care NOT to remove the
two ply stitches noted in blue. If
removed, your fabric won't have a
folding stitch for the next step.