CREATING A NAPKIN
STEP-BY-STEP INSTRUCTIONS
A B
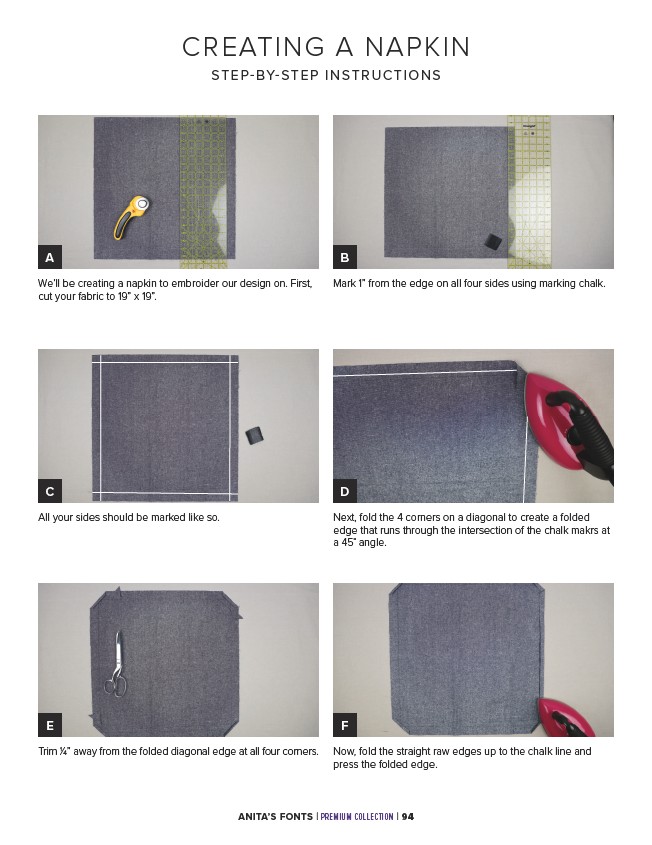
Mark 1” from the edge on all four sides using marking chalk.
We’ll be creating a napkin to embroider our design on. First,
cut your fabric to 19” x 19”.
C D
All your sides should be marked like so. Next, fold the 4 corners on a diagonal to create a folded
edge that runs through the intersection of the chalk makrs at
a 45˚ angle.
E F
Trim 1⁄4” away from the folded diagonal edge at all four corners. Now, fold the straight raw edges up to the chalk line and
press the folded edge.
ANITA’S FONTS | PREMIUM COLLECTION | 94