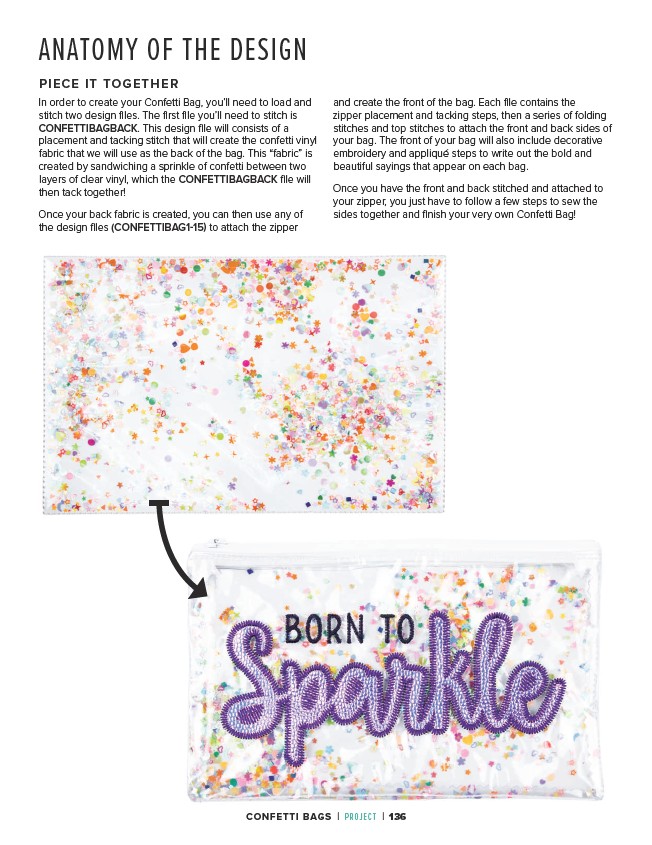
In order to create your Confetti Bag, you’ll need to load and
stitch two design files. The first file you’ll need to stitch is
CONFETTIBAGBACK. This design file will consists of a
placement and tacking stitch that will create the confetti vinyl
fabric that we will use as the back of the bag. This “fabric” is
created by sandwiching a sprinkle of confetti between two
layers of clear vinyl, which the CONFETTIBAGBACK file will
then tack together!
Once your back fabric is created, you can then use any of
the design files (CONFETTIBAG1-15) to attach the zipper
and create the front of the bag. Each file contains the
zipper placement and tacking steps, then a series of folding
stitches and top stitches to attach the front and back sides of
your bag. The front of your bag will also include decorative
embroidery and appliqué steps to write out the bold and
beautiful sayings that appear on each bag.
Once you have the front and back stitched and attached to
your zipper, you just have to follow a few steps to sew the
sides together and finish your very own Confetti Bag!
ANATOMY OF THE DESIGN
PIECE IT TOGETHER
CONFETTI BAGS | PROJECT | 136