CREATING THE APPENDAGES
STEP-BY-STEP INSTRUCTIONS
A B
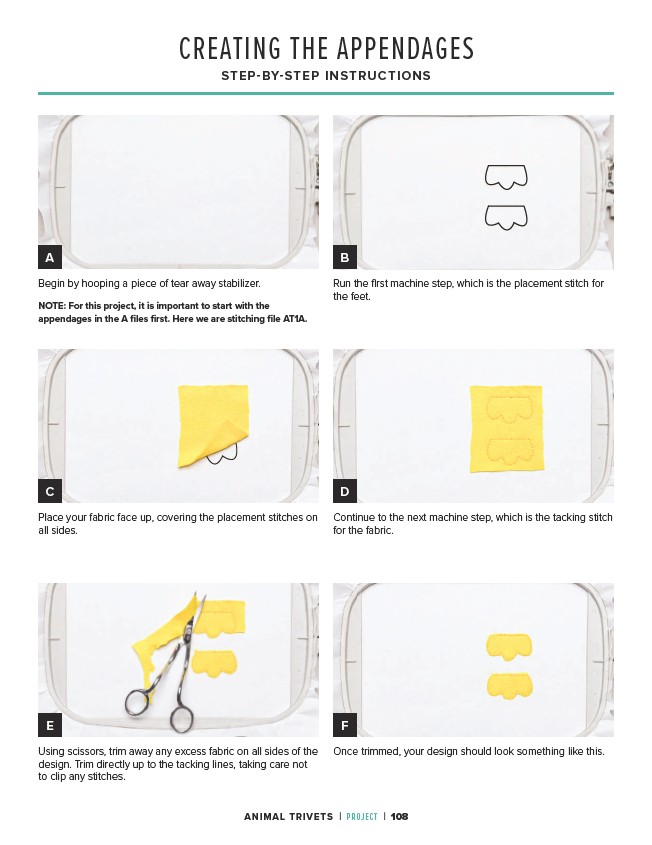
Run the first machine step, which is the placement stitch for
the feet.
C D
Place your fabric face up, covering the placement stitches on
all sides.
Continue to the next machine step, which is the tacking stitch
for the fabric.
E F
Using scissors, trim away any excess fabric on all sides of the
design. Trim directly up to the tacking lines, taking care not
to clip any stitches.
Once trimmed, your design should look something like this.
Begin by hooping a piece of tear away stabilizer.
NOTE: For this project, it is important to start with the
appendages in the A files first. Here we are stitching file AT1A.
ANIMAL TRIVETS | PROJECT | 108