13 14
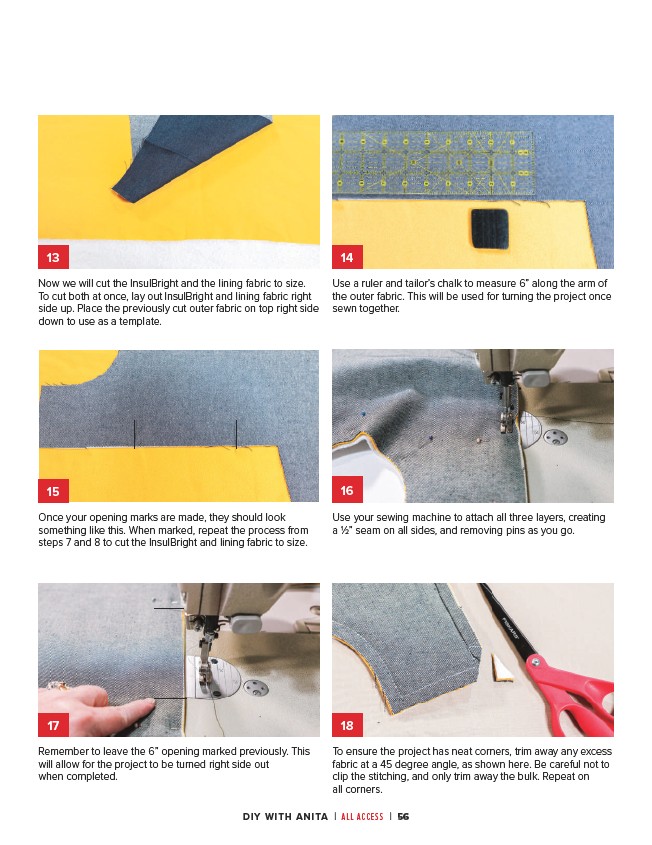
Use a ruler and tailor’s chalk to measure 6” along the arm of
the outer fabric. This will be used for turning the project once
sewn together.
Now we will cut the InsulBright and the lining fabric to size.
To cut both at once, lay out InsulBright and lining fabric right
side up. Place the previously cut outer fabric on top right side
down to use as a template.
15 16
Once your opening marks are made, they should look
something like this. When marked, repeat the process from
steps 7 and 8 to cut the InsulBright and lining fabric to size.
Use your sewing machine to attach all three layers, creating
a 1⁄2” seam on all sides, and removing pins as you go.
17 18
Remember to leave the 6” opening marked previously. This
will allow for the project to be turned right side out
when completed.
To ensure the project has neat corners, trim away any excess
fabric at a 45 degree angle, as shown here. Be careful not to
clip the stitching, and only trim away the bulk. Repeat on
all corners.
DIY WITH ANITA | ALL ACCESS | 56