HOOPING #2 - FINISHING YOUR WALLET
STEP-BY-STEP INSTRUCTIONS
A B
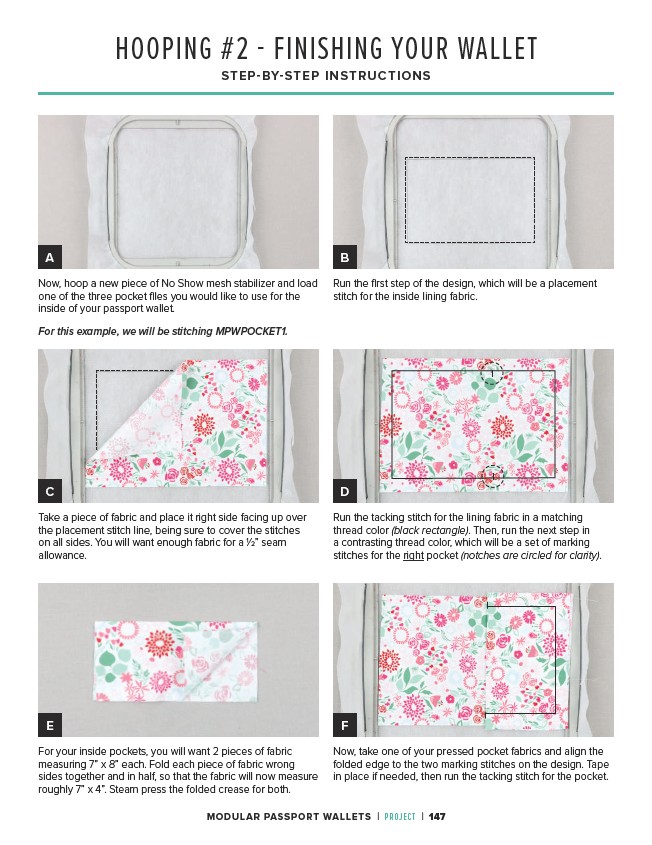
Run the first step of the design, which will be a placement
stitch for the inside lining fabric.
C D
Take a piece of fabric and place it right side facing up over
the placement stitch line, being sure to cover the stitches
on all sides. You will want enough fabric for a 1⁄2” seam
allowance.
Run the tacking stitch for the lining fabric in a matching
thread color (black rectangle). Then, run the next step in
a contrasting thread color, which will be a set of marking
stitches for the right pocket (notches are circled for clarity).
E F
For your inside pockets, you will want 2 pieces of fabric
measuring 7” x 8” each. Fold each piece of fabric wrong
sides together and in half, so that the fabric will now measure
roughly 7” x 4”. Steam press the folded crease for both.
Now, take one of your pressed pocket fabrics and align the
folded edge to the two marking stitches on the design. Tape
in place if needed, then run the tacking stitch for the pocket.
Now, hoop a new piece of No Show mesh stabilizer and load
one of the three pocket files you would like to use for the
inside of your passport wallet.
For this example, we will be stitching MPWPOCKET1.
MODULAR PASSPORT WALLETS | PROJECT | 147