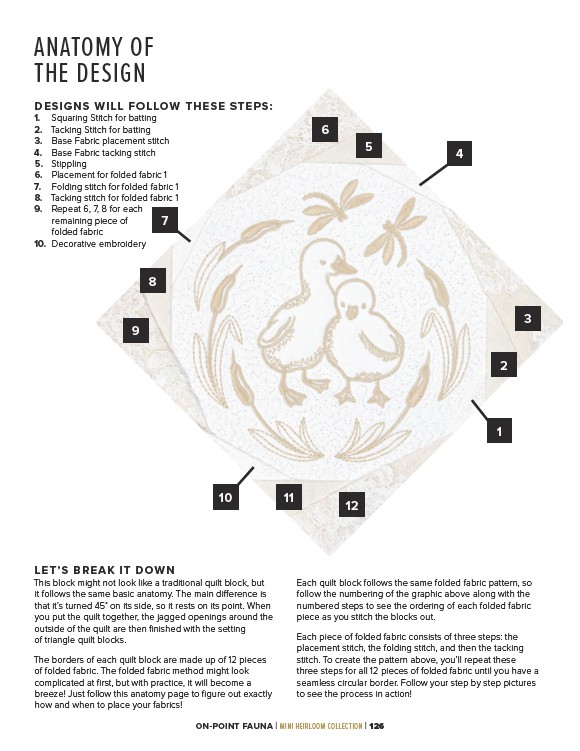
DESIGNS WILL FOLLOW THESE STEPS:
1. Squaring Stitch for batting
2. Tacking Stitch for batting
3. Base Fabric placement stitch
4. Base Fabric tacking stitch
5. Stippling
6. Placement for folded fabric 1
7. Folding stitch for folded fabric 1
8. Tacking stitch for folded fabric 1
9. Repeat 6, 7, 8 for each
ON-POINT FAUNA | MINI HEIRLOOM COLLECTION | 126
remaining piece of
folded fabric
10. Decorative embroidery
2
1
3
5 4
6
8
9
10 11 12
7
This block might not look like a traditional quilt block, but
it follows the same basic anatomy. The main difference is
that it’s turned 45˚ on its side, so it rests on its point. When
you put the quilt together, the jagged openings around the
outside of the quilt are then finished with the setting
of triangle quilt blocks.
The borders of each quilt block are made up of 12 pieces
of folded fabric. The folded fabric method might look
complicated at first, but with practice, it will become a
breeze! Just follow this anatomy page to figure out exactly
how and when to place your fabrics!
Each quilt block follows the same folded fabric pattern, so
follow the numbering of the graphic above along with the
numbered steps to see the ordering of each folded fabric
piece as you stitch the blocks out.
Each piece of folded fabric consists of three steps: the
placement stitch, the folding stitch, and then the tacking
stitch. To create the pattern above, you’ll repeat these
three steps for all 12 pieces of folded fabric until you have a
seamless circular border. Follow your step by step pictures
to see the process in action!
ANATOMY OF
THE DESIGN
LET’S BREAK IT DOWN