VALET TRAY STEP-BY-STEP INSTRUCTIONS
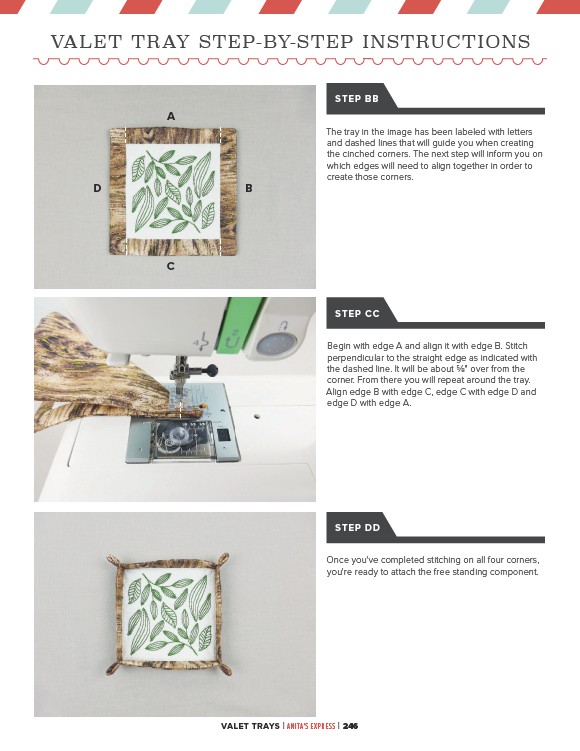
STEP BB
The tray in the image has been labeled with letters
and dashed lines that will guide you when creating
the cinched corners. The next step will inform you on
which edges will need to align together in order to
create those corners.
STEP CC
Begin with edge A and align it with edge B. Stitch
perpendicular to the straight edge as indicated with
the dashed line. It will be about 5⁄8" over from the
corner. From there you will repeat around the tray.
Align edge B with edge C, edge C with edge D and
edge D with edge A.
STEP DD
Once you've completed stitching on all four corners,
you're ready to attach the free standing component.
D B
VALET TRAYS | ANITA'S EXPRESS | 246
A
C