5 6
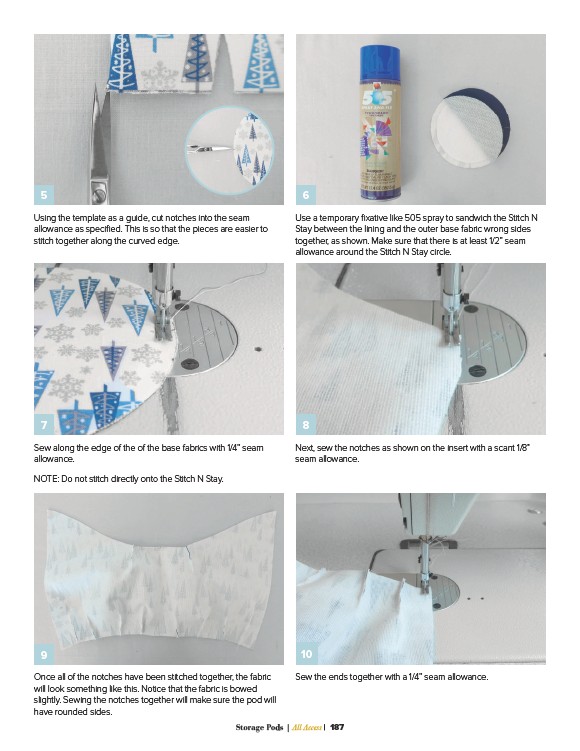
Using the template as a guide, cut notches into the seam
allowance as specified. This is so that the pieces are easier to
stitch together along the curved edge.
7 8
Sew along the edge of the of the base fabrics with 1/4” seam
allowance.
NOTE: Do not stitch directly onto the Stitch N Stay.
9 10
Once all of the notches have been stitched together, the fabric
will look something like this. Notice that the fabric is bowed
slightly. Sewing the notches together will make sure the pod will
have rounded sides.
Use a temporary fixative like 505 spray to sandwich the Stitch N
Stay between the lining and the outer base fabric wrong sides
together, as shown. Make sure that there is at least 1/2” seam
allowance around the Stitch N Stay circle.
Next, sew the notches as shown on the insert with a scant 1/8”
seam allowance.
Sew the ends together with a 1/4” seam allowance.
Storage Pods | All Access | 187