14 15
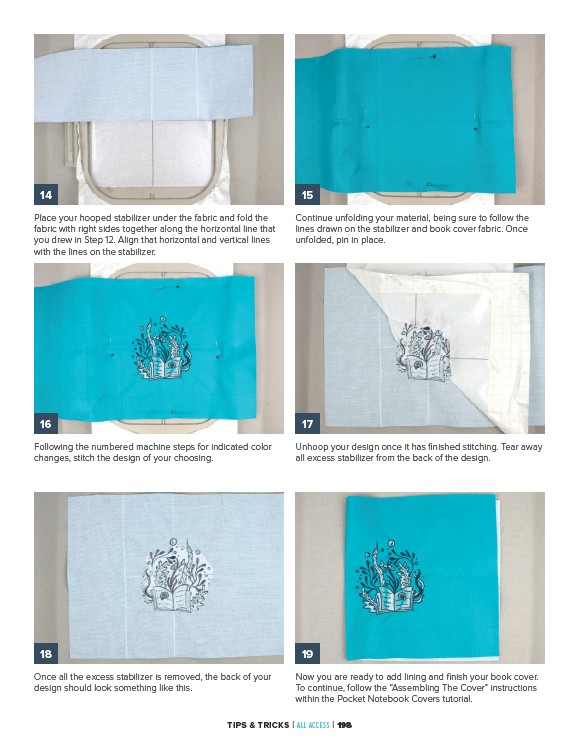
Place your hooped stabilizer under the fabric and fold the
fabric with right sides together along the horizontal line that
you drew in Step 12. Align that horizontal and vertical lines
with the lines on the stabilizer.
16 17
Following the numbered machine steps for indicated color
changes, stitch the design of your choosing.
18 19
Once all the excess stabilizer is removed, the back of your
design should look something like this.
Continue unfolding your material, being sure to follow the
lines drawn on the stabilizer and book cover fabric. Once
unfolded, pin in place.
Unhoop your design once it has finished stitching. Tear away
all excess stabilizer from the back of the design.
Now you are ready to add lining and finish your book cover.
To continue, follow the “Assembling The Cover” instructions
within the Pocket Notebook Covers tutorial.
TIPS & TRICKS | ALL ACCESS | 198