ASSEMBLING THE COVER
STEP-BY-STEP INSTRUCTIONS
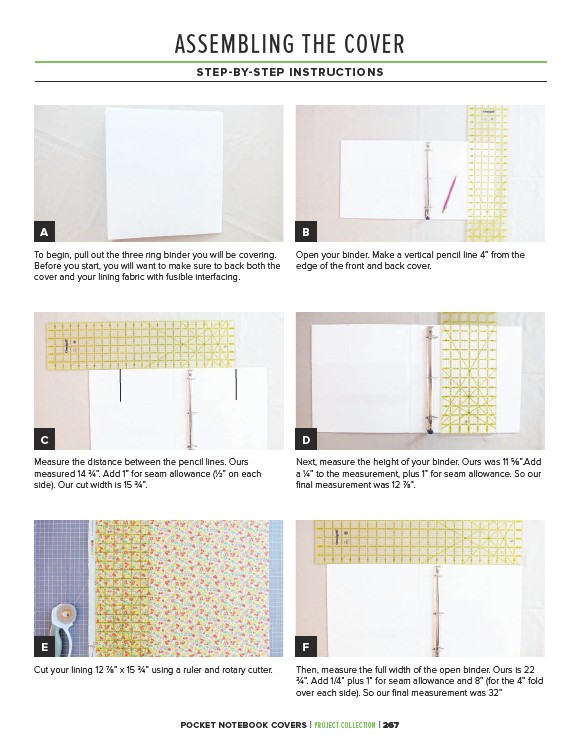
A B
Open your binder. Make a vertical pencil line 4” from the
edge of the front and back cover.
To begin, pull out the three ring binder you will be covering.
Before you start, you will want to make sure to back both the
cover and your lining fabric with fusible interfacing.
C D
Measure the distance between the pencil lines. Ours
measured 14 3⁄4”. Add 1” for seam allowance (1⁄2” on each
side). Our cut width is 15 3⁄4”.
Next, measure the height of your binder. Ours was 11 5⁄8”.Add
a 1⁄4” to the measurement, plus 1” for seam allowance. So our
final measurement was 12 7⁄8”.
E F
Cut your lining 12 7⁄8” x 15 3⁄4” using a ruler and rotary cutter. Then, measure the full width of the open binder. Ours is 22
3⁄4”. Add 1/4” plus 1” for seam allowance and 8” (for the 4” fold
over each side). So our final measurement was 32”
POCKET NOTEBOOK COVERS | PROJECT COLLECTION | 267