Putting Your Blocks Together
STEP- BY- STEP
A B
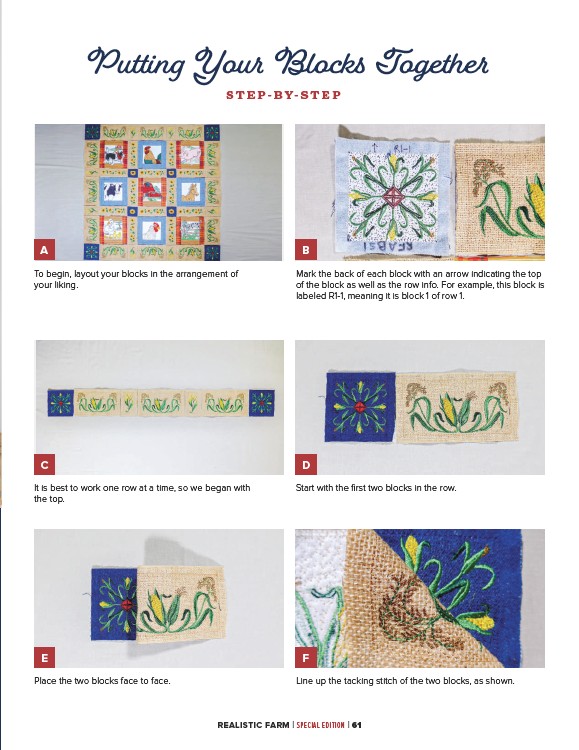
Mark the back of each block with an arrow indicating the top
of the block as well as the row info. For example, this block is
labeled R1-1, meaning it is block 1 of row 1.
To begin, layout your blocks in the arrangement of
your liking.
C D
It is best to work one row at a time, so we began with
the top.
Start with the first two blocks in the row.
E F
Place the two blocks face to face. Line up the tacking stitch of the two blocks, as shown.
REALISTIC FARM | SPECIAL EDITION | 61