CREATING THE FRONT
STEP-BY-STEP INSTRUCTIONS
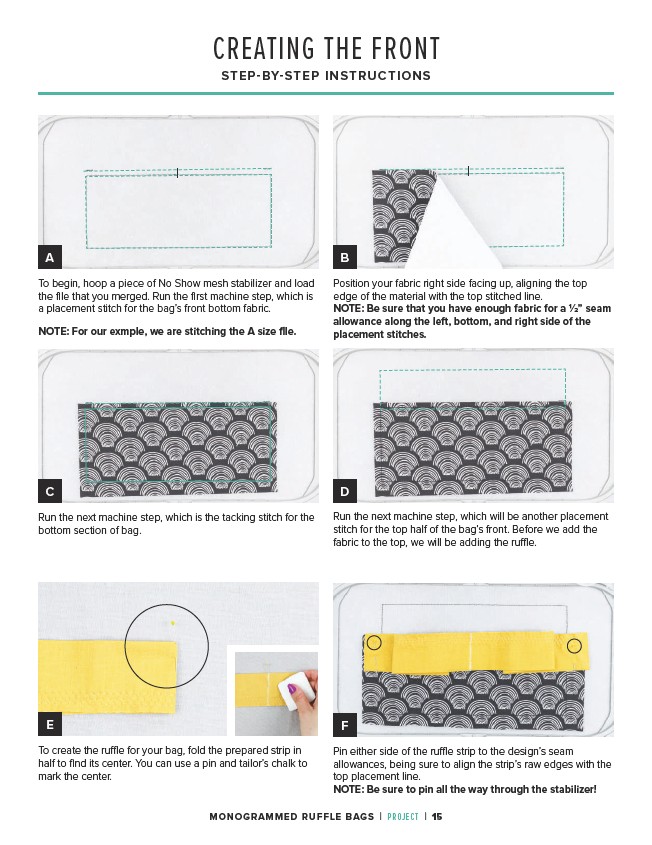
A B
Position your fabric right side facing up, aligning the top
edge of the material with the top stitched line.
NOTE: Be sure that you have enough fabric for a 1⁄2” seam
allowance along the left, bottom, and right side of the
placement stitches.
C
Run the next machine step, which is the tacking stitch for the
bottom section of bag.
E
To create the ruffle for your bag, fold the prepared strip in
half to find its center. You can use a pin and tailor’s chalk to
mark the center.
D
Run the next machine step, which will be another placement
stitch for the top half of the bag’s front. Before we add the
fabric to the top, we will be adding the ruffle.
F
Pin either side of the ruffle strip to the design’s seam
allowances, being sure to align the strip’s raw edges with the
top placement line.
NOTE: Be sure to pin all the way through the stabilizer!
To begin, hoop a piece of No Show mesh stabilizer and load
the file that you merged. Run the first machine step, which is
a placement stitch for the bag’s front bottom fabric.
NOTE: For our exmple, we are stitching the A size file.
MONOGRAMMED RUFFLE BAGS | PROJECT | 15