CREATING THE PIECES
STEP J
Wind a matching bobbin for each step after the back
fabric has been attached.
STEP K
Since this dangler is free-standing,
any stitches from this point will be
visible in the finished project.
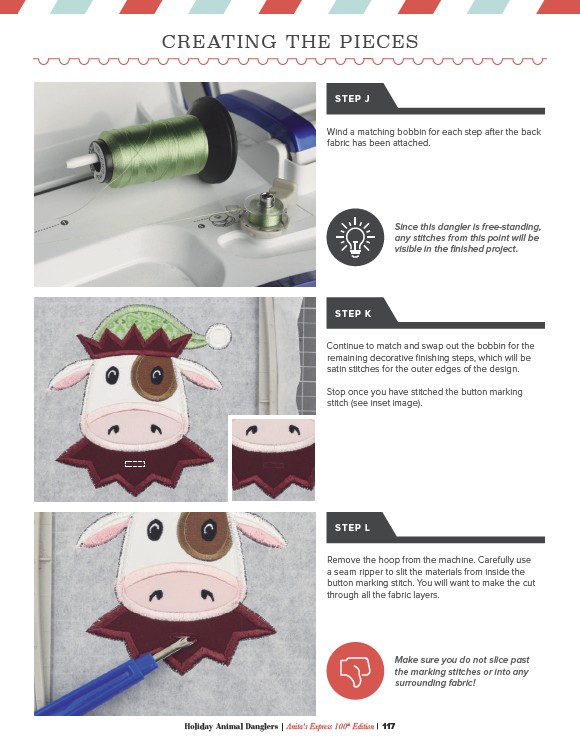
Continue to match and swap out the bobbin for the
remaining decorative finishing steps, which will be
satin stitches for the outer edges of the design.
Stop once you have stitched the button marking
stitch (see inset image).
STEP L
Remove the hoop from the machine. Carefully use
a seam ripper to slit the materials from inside the
button marking stitch. You will want to make the cut
through all the fabric layers.
Make sure you do not slice past
the marking stitches or into any
surrounding fabric!
Holiday Animal Danglers | Anita's Express 100th Edition | 117