STEP-BY-STEP INSTRUCTIONS
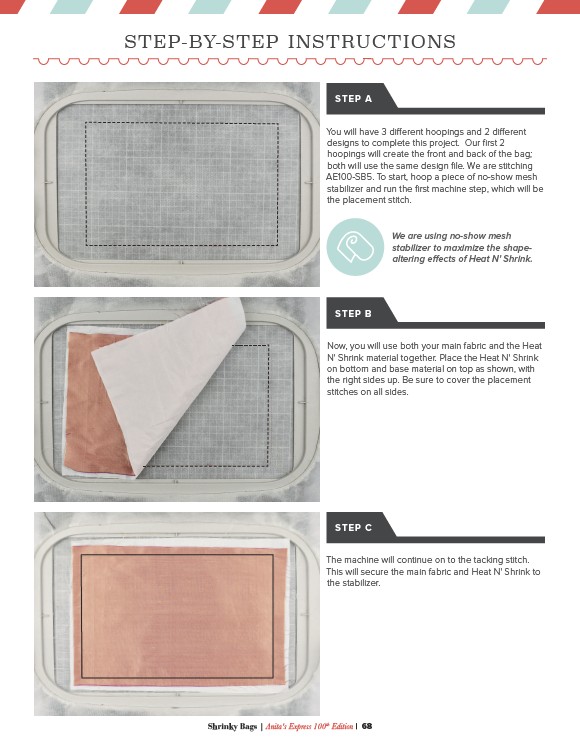
You will have 3 different hoopings and 2 different
designs to complete this project. Our first 2
hoopings will create the front and back of the bag;
both will use the same design file. We are stitching
AE100-SB5. To start, hoop a piece of no-show mesh
stabilizer and run the first machine step, which will be
the placement stitch.
Now, you will use both your main fabric and the Heat
N' Shrink material together. Place the Heat N' Shrink
on bottom and base material on top as shown, with
the right sides up. Be sure to cover the placement
stitches on all sides.
The machine will continue on to the tacking stitch.
This will secure the main fabric and Heat N' Shrink to
the stabilizer.
Shrinky Bags | Anita's Express 100th Edition | 68
We are using no-show mesh
stabilizer to maximize the shapealtering
effects of Heat N' Shrink.
STEP A
STEP B
STEP C