Final Assembly
Step-by-Step Instructions
A B
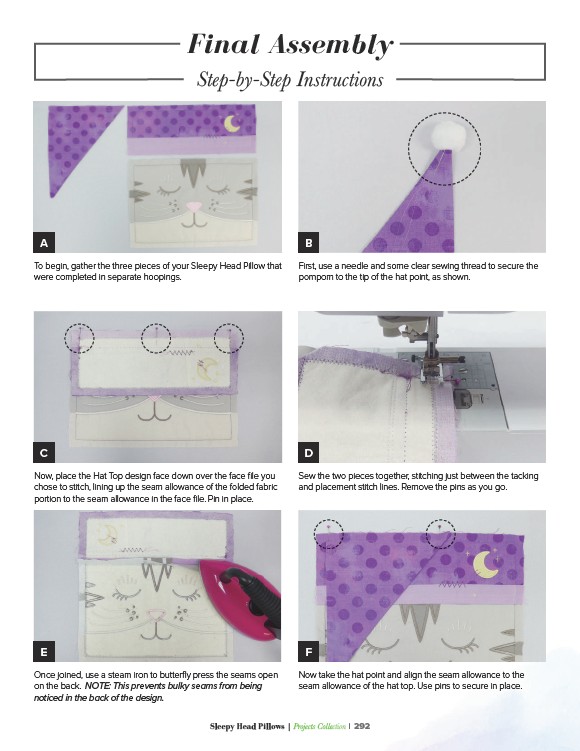
To begin, gather the three pieces of your Sleepy Head Pillow that
were completed in separate hoopings.
First, use a needle and some clear sewing thread to secure the
pompom to the tip of the hat point, as shown.
C D
Now, place the Hat Top design face down over the face file you
chose to stitch, lining up the seam allowance of the folded fabric
portion to the seam allowance in the face file. Pin in place.
Sew the two pieces together, stitching just between the tacking
and placement stitch lines. Remove the pins as you go.
E F
Once joined, use a steam iron to butterfly press the seams open
on the back. NOTE: This prevents bulky seams from being
noticed in the back of the design.
Now take the hat point and align the seam allowance to the
seam allowance of the hat top. Use pins to secure in place.
Sleepy Head Pillows | Projects Collection | 292