STEP-BY-STEP INSTRUCTIONS
STEP G
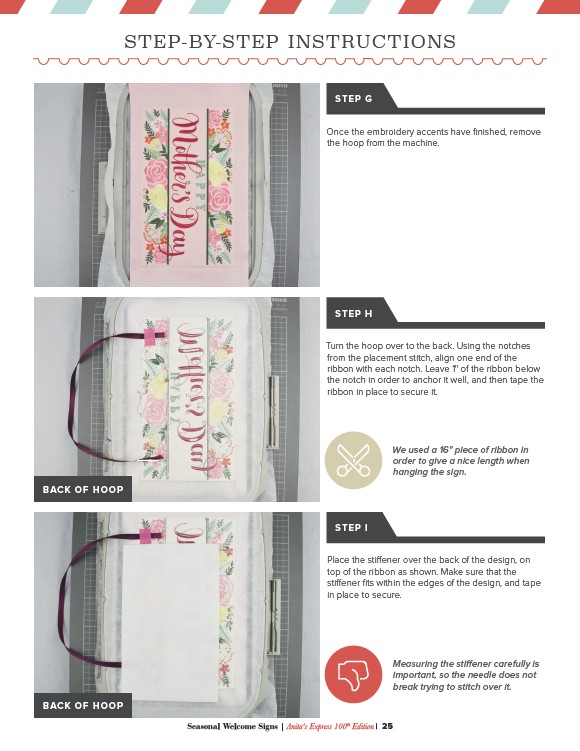
Once the embroidery accents have finished, remove
the hoop from the machine.
STEP H
Turn the hoop over to the back. Using the notches
from the placement stitch, align one end of the
ribbon with each notch. Leave 1" of the ribbon below
the notch in order to anchor it well, and then tape the
ribbon in place to secure it.
STEP I
We used a 16" piece of ribbon in
order to give a nice length when
hanging the sign.
Place the stiffener over the back of the design, on
top of the ribbon as shown. Make sure that the
stiffener fits within the edges of the design, and tape
in place to secure.
Seasonal Welcome Signs | Anita's Express 100th Edition | 25
Measuring the stiffener carefully is
important, so the needle does not
break trying to stitch over it.
BACK OF HOOP
BACK OF HOOP