G H
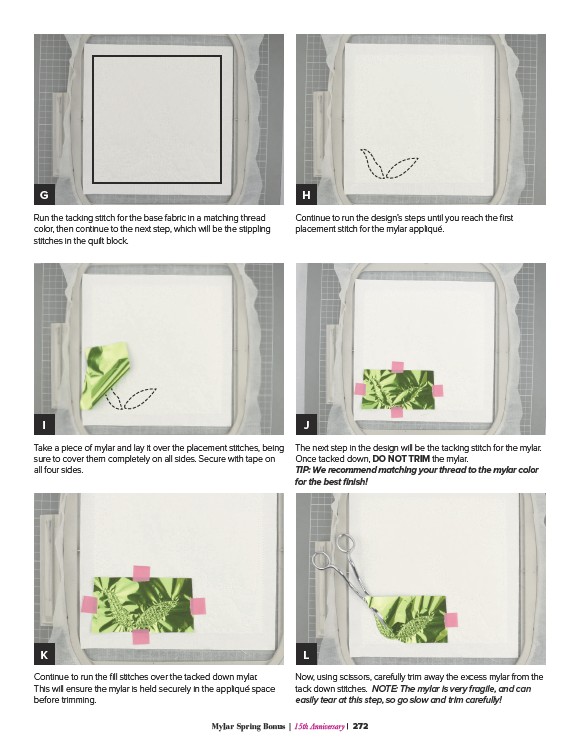
Run the tacking stitch for the base fabric in a matching thread
color, then continue to the next step, which will be the stippling
stitches in the quilt block.
I J
Take a piece of mylar and lay it over the placement stitches, being
sure to cover them completely on all sides. Secure with tape on
all four sides.
K L
Continue to run the fill stitches over the tacked down mylar.
This will ensure the mylar is held securely in the appliqué space
before trimming.
Continue to run the design’s steps until you reach the first
placement stitch for the mylar appliqué.
The next step in the design will be the tacking stitch for the mylar.
Once tacked down, DO NOT TRIM the mylar.
TIP: We recommend matching your thread to the mylar color
for the best finish!
Now, using scissors, carefully trim away the excess mylar from the
tack down stitches. NOTE: The mylar is very fragile, and can
easily tear at this step, so go slow and trim carefully!
Mylar Spring Bonus | 15th Anniversary | 272