G H
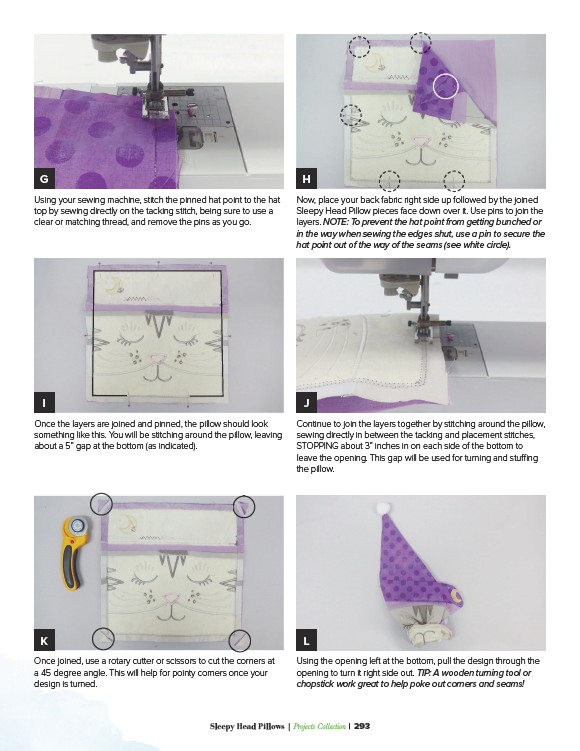
Using your sewing machine, stitch the pinned hat point to the hat
top by sewing directly on the tacking stitch, being sure to use a
clear or matching thread, and remove the pins as you go.
Now, place your back fabric right side up followed by the joined
Sleepy Head Pillow pieces face down over it. Use pins to join the
layers. NOTE: To prevent the hat point from getting bunched or
in the way when sewing the edges shut, use a pin to secure the
hat point out of the way of the seams (see white circle).
I J
Once the layers are joined and pinned, the pillow should look
something like this. You will be stitching around the pillow, leaving
about a 5” gap at the bottom (as indicated).
Continue to join the layers together by stitching around the pillow,
sewing directly in between the tacking and placement stitches,
STOPPING about 3” inches in on each side of the bottom to
leave the opening. This gap will be used for turning and stuffing
the pillow.
K L
Once joined, use a rotary cutter or scissors to cut the corners at
a 45 degree angle. This will help for pointy corners once your
design is turned.
Using the opening left at the bottom, pull the design through the
opening to turn it right side out. TIP: A wooden turning tool or
chopstick work great to help poke out corners and seams!
Sleepy Head Pillows | Projects Collection | 293