Hat Point
Step-by-Step Instructions
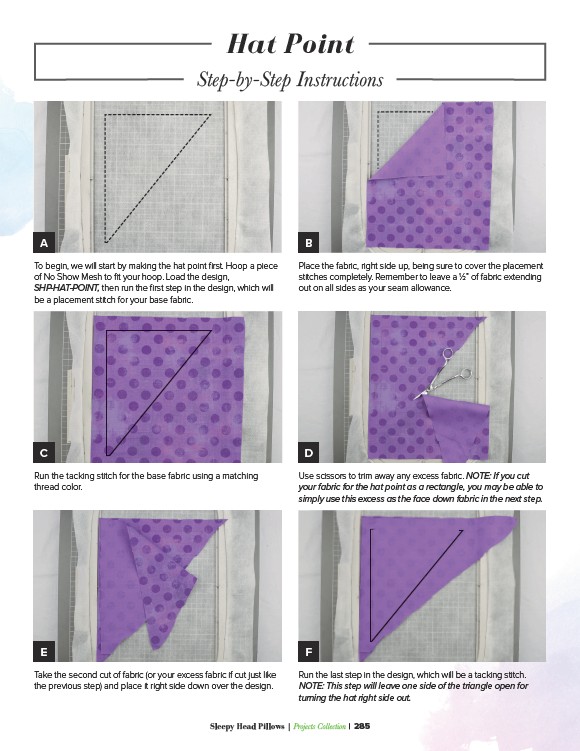
A B
To begin, we will start by making the hat point first. Hoop a piece
of No Show Mesh to fit your hoop. Load the design,
SHP-HAT-POINT, then run the first step in the design, which will
be a placement stitch for your base fabric.
Place the fabric, right side up, being sure to cover the placement
stitches completely. Remember to leave a 1⁄2” of fabric extending
out on all sides as your seam allowance.
C D
Run the tacking stitch for the base fabric using a matching
thread color.
Use scissors to trim away any excess fabric. NOTE: If you cut
your fabric for the hat point as a rectangle, you may be able to
simply use this excess as the face down fabric in the next step.
E F
Take the second cut of fabric (or your excess fabric if cut just like
the previous step) and place it right side down over the design.
Run the last step in the design, which will be a tacking stitch.
NOTE: This step will leave one side of the triangle open for
turning the hat right side out.
Sleepy Head Pillows | Projects Collection | 285