G H
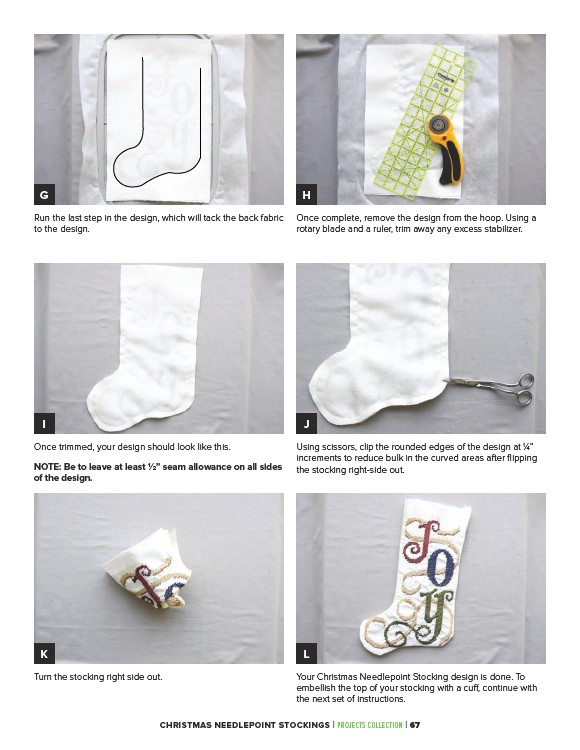
Run the last step in the design, which will tack the back fabric
to the design.
I J
Once trimmed, your design should look like this.
NOTE: Be to leave at least 1⁄2” seam allowance on all sides
of the design.
K L
Turn the stocking right side out.
Once complete, remove the design from the hoop. Using a
rotary blade and a ruler, trim away any excess stabilizer.
Using scissors, clip the rounded edges of the design at 1⁄4”
increments to reduce bulk in the curved areas after flipping
the stocking right-side out.
Your Christmas Needlepoint Stocking design is done. To
embellish the top of your stocking with a cuff, continue with
the next set of instructions.
CHRISTMAS NEEDLEPOINT STOCKINGS | PROJECTS COLLECTION | 67