SECOND HOOPING & CONSTRUCTION
STEP-BY-STEP INSTRUCTIONS
A B
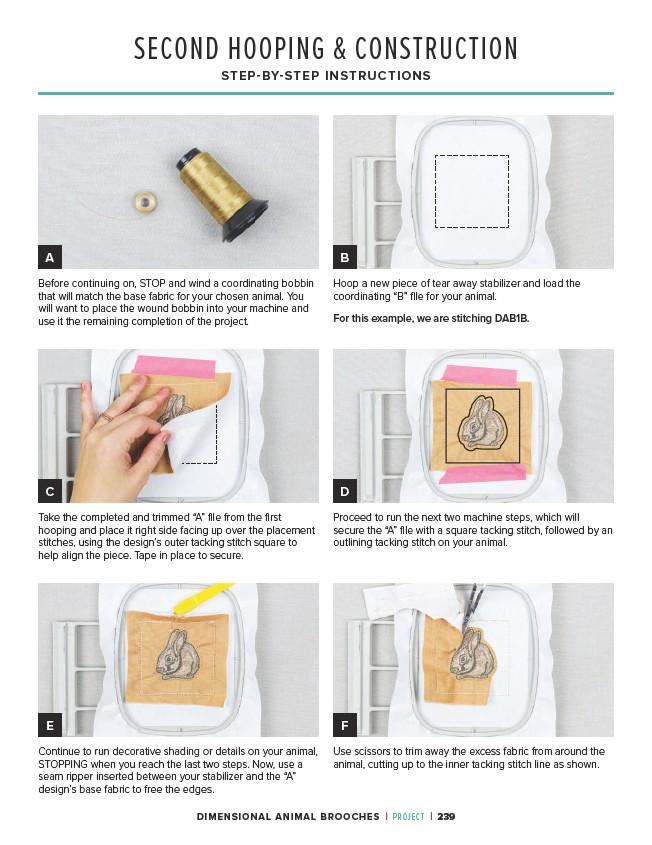
Hoop a new piece of tear away stabilizer and load the
coordinating “B” file for your animal.
For this example, we are stitching DAB1B.
C D
Take the completed and trimmed “A” file from the first
hooping and place it right side facing up over the placement
stitches, using the design’s outer tacking stitch square to
help align the piece. Tape in place to secure.
Proceed to run the next two machine steps, which will
secure the “A” file with a square tacking stitch, followed by an
outlining tacking stitch on your animal.
E F
Continue to run decorative shading or details on your animal,
STOPPING when you reach the last two steps. Now, use a
seam ripper inserted between your stabilizer and the “A”
design’s base fabric to free the edges.
Use scissors to trim away the excess fabric from around the
animal, cutting up to the inner tacking stitch line as shown.
Before continuing on, STOP and wind a coordinating bobbin
that will match the base fabric for your chosen animal. You
will want to place the wound bobbin into your machine and
use it the remaining completion of the project.
DIMENSIONAL ANIMAL BROOCHES | PROJECT | 239