STEP BY STEP instructions
A B
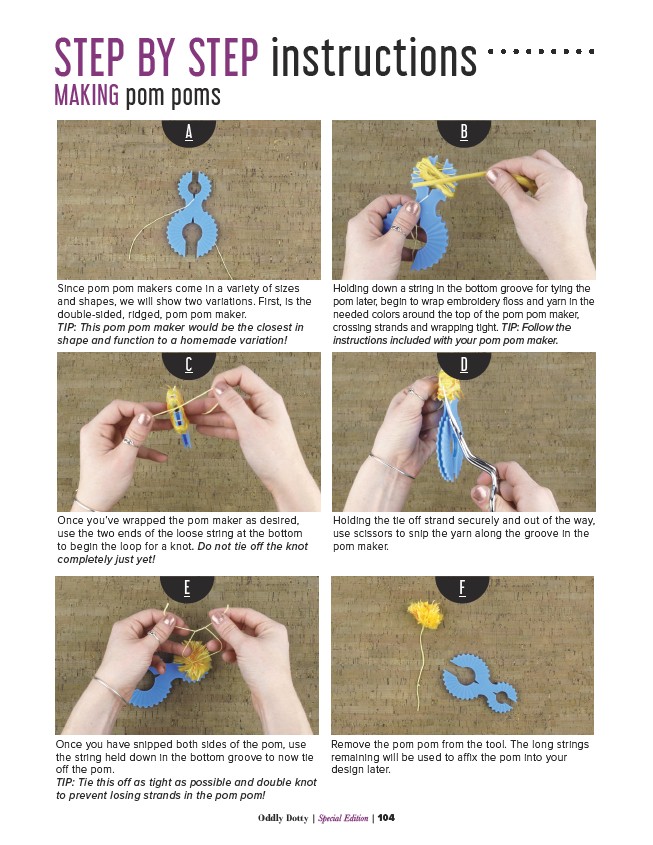
Since pom pom makers come in a variety of sizes
and shapes, we will show two variations. First, is the
double-sided, ridged, pom pom maker.
TIP: This pom pom maker would be the closest in
shape and function to a homemade variation!
Holding down a string in the bottom groove for tying the
pom later, begin to wrap embroidery floss and yarn in the
needed colors around the top of the pom pom maker,
crossing strands and wrapping tight. TIP: Follow the
instructions included with your pom pom maker.
C D
Once you’ve wrapped the pom maker as desired,
use the two ends of the loose string at the bottom
to begin the loop for a knot. Do not tie off the knot
completely just yet!
Holding the tie off strand securely and out of the way,
use scissors to snip the yarn along the groove in the
pom maker.
E F
Once you have snipped both sides of the pom, use
the string held down in the bottom groove to now tie
off the pom.
TIP: Tie this off as tight as possible and double knot
to prevent losing strands in the pom pom!
Remove the pom pom from the tool. The long strings
remaining will be used to affix the pom into your
design later.
Oddly Dotty | Special Edition | 104
MAKING pom poms