STEP-BY-STEP INSTRUCTIONS
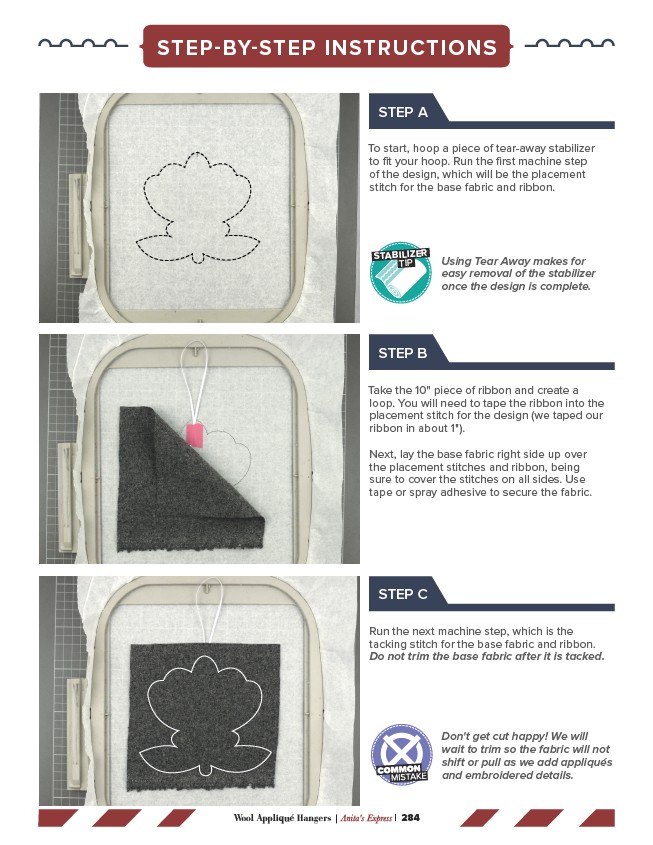
To start, hoop a piece of tear-away stabilizer
to fit your hoop. Run the first machine step
of the design, which will be the placement
stitch for the base fabric and ribbon.
STABILIZER
TIP Using Tear Away makes for
Take the 10" piece of ribbon and create a
loop. You will need to tape the ribbon into the
placement stitch for the design (we taped our
ribbon in about 1").
Next, lay the base fabric right side up over
the placement stitches and ribbon, being
sure to cover the stitches on all sides. Use
tape or spray adhesive to secure the fabric.
Run the next machine step, which is the
tacking stitch for the base fabric and ribbon.
Do not trim the base fabric after it is tacked.
Wool Appliqué Hangers | Anita's Express | 284
easy removal of the stabilizer
once the design is complete.
STEP A
STEP B
STEP C
Don't get cut happy! We will
wait to trim so the fabric will not
shift or pull as we add appliqués
and embroidered details.