G H
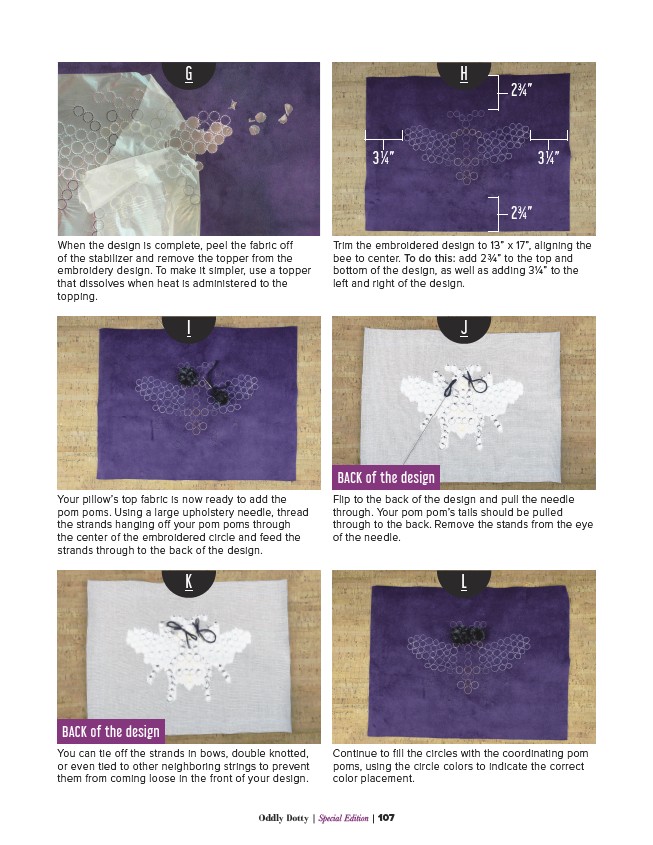
When the design is complete, peel the fabric off
of the stabilizer and remove the topper from the
embroidery design. To make it simpler, use a topper
that dissolves when heat is administered to the
topping.
3¼” 3¼”
Trim the embroidered design to 13” x 17”, aligning the
bee to center. To do this: add 23⁄4” to the top and
bottom of the design, as well as adding 31⁄4” to the
left and right of the design.
I J
Your pillow’s top fabric is now ready to add the
pom poms. Using a large upholstery needle, thread
the strands hanging off your pom poms through
the center of the embroidered circle and feed the
strands through to the back of the design.
Flip to the back of the design and pull the needle
through. Your pom pom’s tails should be pulled
through to the back. Remove the stands from the eye
of the needle.
K L
You can tie off the strands in bows, double knotted,
or even tied to other neighboring strings to prevent
them from coming loose in the front of your design.
Continue to fill the circles with the coordinating pom
poms, using the circle colors to indicate the correct
color placement.
Oddly Dotty | Special Edition | 107
2¾”
2¾”
BACK of the design
BACK of the design