D E
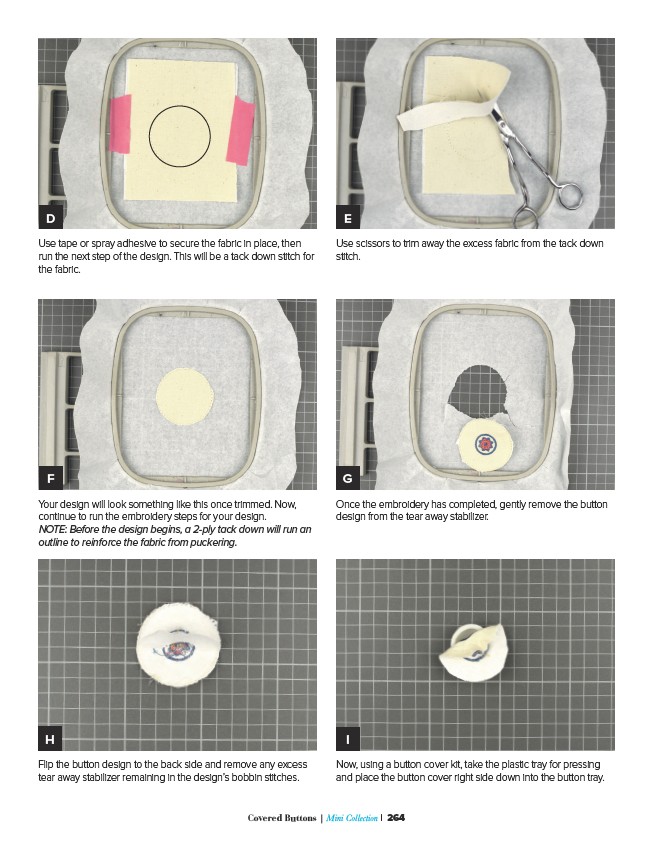
Use tape or spray adhesive to secure the fabric in place, then
run the next step of the design. This will be a tack down stitch for
the fabric.
Use scissors to trim away the excess fabric from the tack down
stitch.
F G
Your design will look something like this once trimmed. Now,
continue to run the embroidery steps for your design.
NOTE: Before the design begins, a 2-ply tack down will run an
outline to reinforce the fabric from puckering.
Once the embroidery has completed, gently remove the button
design from the tear away stabilizer.
H I
Flip the button design to the back side and remove any excess
tear away stabilizer remaining in the design’s bobbin stitches.
Now, using a button cover kit, take the plastic tray for pressing
and place the button cover right side down into the button tray.
Covered Buttons | ������������������������������ | 264