STEP BY STEP instructions
MAKING the case
A B
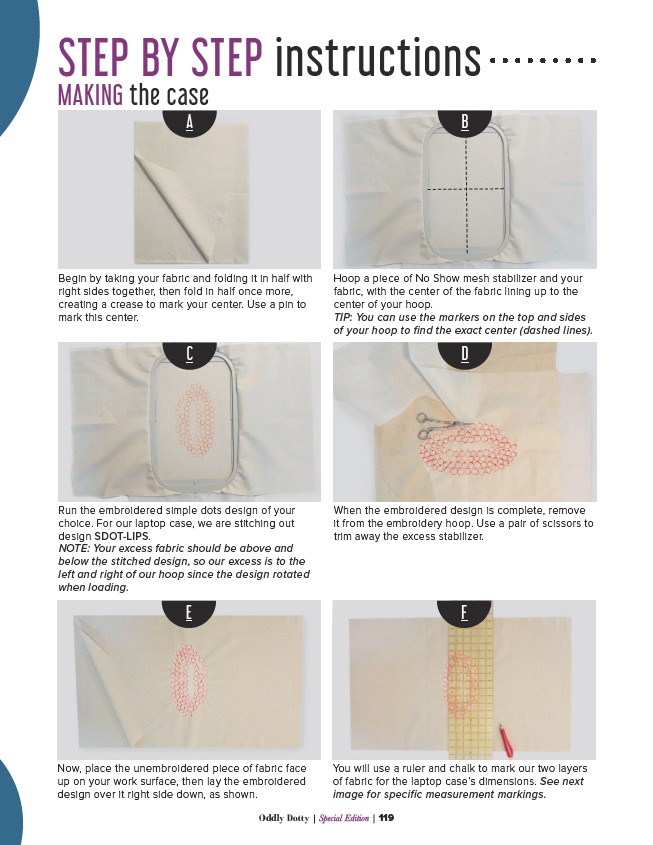
Begin by taking your fabric and folding it in half with
right sides together, then fold in half once more,
creating a crease to mark your center. Use a pin to
mark this center.
Hoop a piece of No Show mesh stabilizer and your
fabric, with the center of the fabric lining up to the
center of your hoop.
TIP: You can use the markers on the top and sides
of your hoop to find the exact center (dashed lines).
C D
Run the embroidered simple dots design of your
choice. For our laptop case, we are stitching out
design SDOT-LIPS.
NOTE: Your excess fabric should be above and
below the stitched design, so our excess is to the
left and right of our hoop since the design rotated
when loading.
When the embroidered design is complete, remove
it from the embroidery hoop. Use a pair of scissors to
trim away the excess stabilizer.
E F
Now, place the unembroidered piece of fabric face
up on your work surface, then lay the embroidered
design over it right side down, as shown.
You will use a ruler and chalk to mark our two layers
of fabric for the laptop case’s dimensions. See next
image for specific measurement markings.
Oddly Dotty | Special Edition | 119