G H
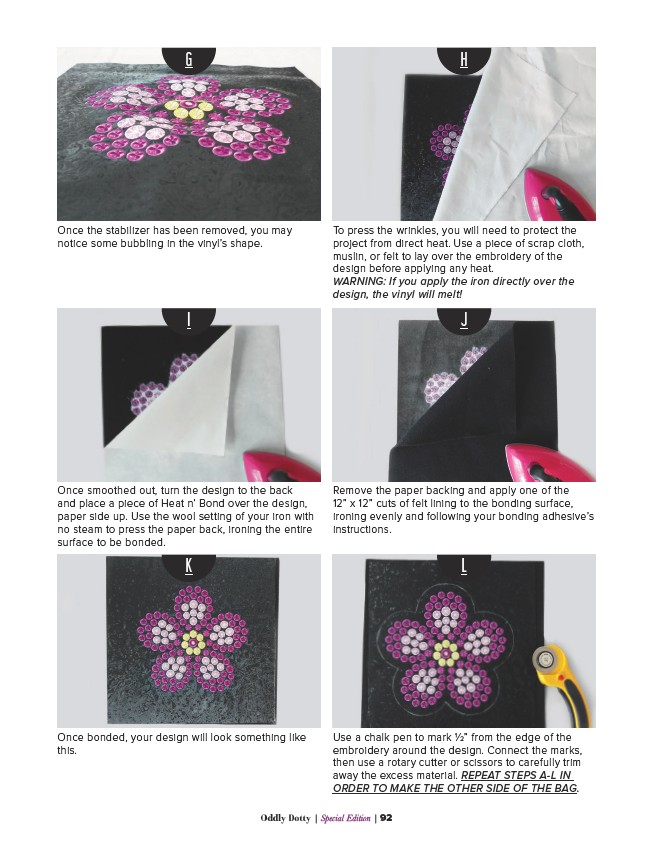
Once the stabilizer has been removed, you may
notice some bubbling in the vinyl’s shape.
To press the wrinkles, you will need to protect the
project from direct heat. Use a piece of scrap cloth,
muslin, or felt to lay over the embroidery of the
design before applying any heat.
WARNING: If you apply the iron directly over the
design, the vinyl will melt!
I J
Once smoothed out, turn the design to the back
and place a piece of Heat n’ Bond over the design,
paper side up. Use the wool setting of your iron with
no steam to press the paper back, ironing the entire
surface to be bonded.
Remove the paper backing and apply one of the
12” x 12” cuts of felt lining to the bonding surface,
ironing evenly and following your bonding adhesive’s
instructions.
K L
Once bonded, your design will look something like
this.
Use a chalk pen to mark 1⁄2” from the edge of the
embroidery around the design. Connect the marks,
then use a rotary cutter or scissors to carefully trim
away the excess material. REPEAT STEPS A-L IN
ORDER TO MAKE THE OTHER SIDE OF THE BAG.
Oddly Dotty | Special Edition | 92