STEP BY STEP instructions
MAKING the blocks
A B
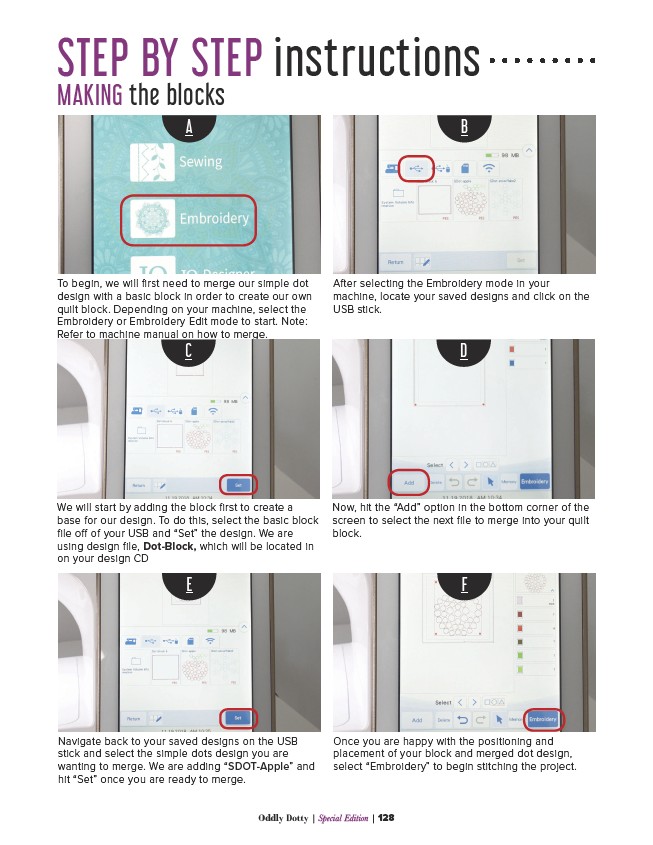
To begin, we will first need to merge our simple dot
design with a basic block in order to create our own
quilt block. Depending on your machine, select the
Embroidery or Embroidery Edit mode to start. Note:
Refer to machine manual on how to merge.
After selecting the Embroidery mode in your
machine, locate your saved designs and click on the
USB stick.
C D
We will start by adding the block first to create a
base for our design. To do this, select the basic block
file off of your USB and “Set” the design. We are
using design file, Dot-Block, which will be located in
on your design CD
Now, hit the “Add” option in the bottom corner of the
screen to select the next file to merge into your quilt
block.
E F
Navigate back to your saved designs on the USB
stick and select the simple dots design you are
wanting to merge. We are adding “SDOT-Apple” and
hit “Set” once you are ready to merge.
Once you are happy with the positioning and
placement of your block and merged dot design,
select “Embroidery” to begin stitching the project.
Oddly Dotty | Special Edition | 128