J K
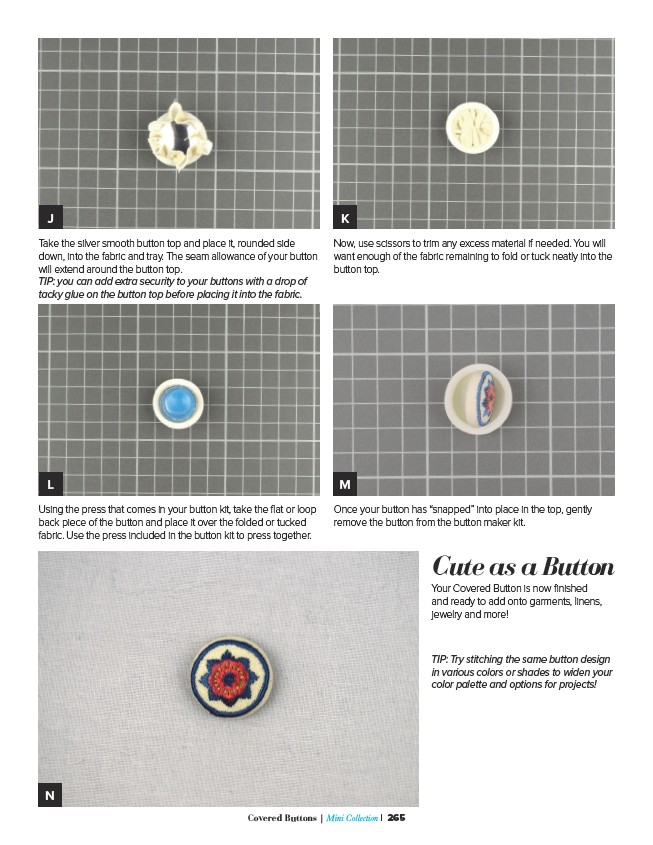
Take the silver smooth button top and place it, rounded side
down, into the fabric and tray. The seam allowance of your button
will extend around the button top.
TIP: you can add extra security to your buttons with a drop of
tacky glue on the button top before placing it into the fabric.
L M
Covered Buttons | ������������������������������ | 265
Cute as a Button
Your Covered Button is now finished
and ready to add onto garments, linens,
jewelry and more!
TIP: Try stitching the same button design
in various colors or shades to widen your
color palette and options for projects!
N
Now, use scissors to trim any excess material if needed. You will
want enough of the fabric remaining to fold or tuck neatly into the
button top.
Using the press that comes in your button kit, take the flat or loop
back piece of the button and place it over the folded or tucked
fabric. Use the press included in the button kit to press together.
Once your button has “snapped” into place in the top, gently
remove the button from the button maker kit.