STEP BY STEP instructions
Oddly Dotty | Special Edition | 113
B
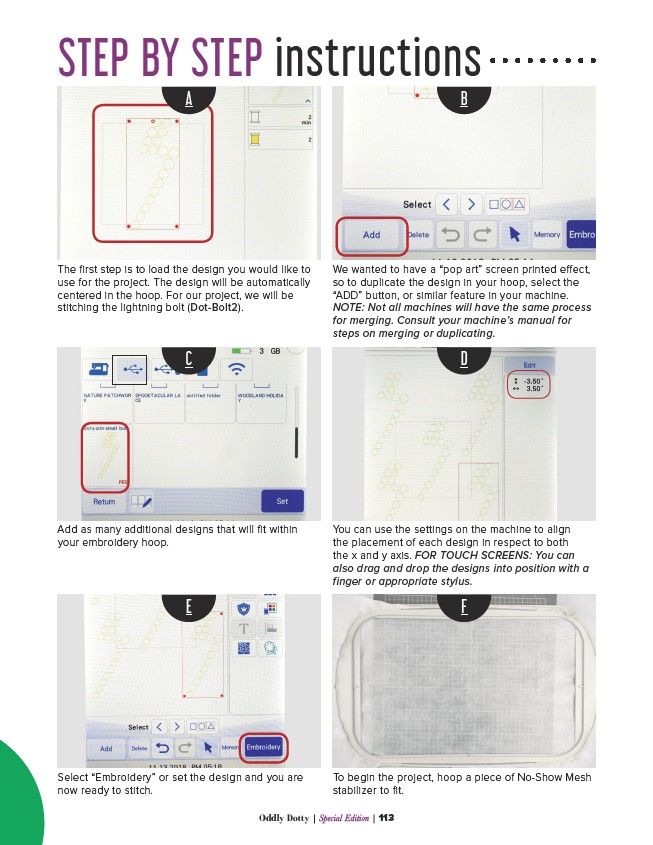
The first step is to load the design you would like to
use for the project. The design will be automatically
centered in the hoop. For our project, we will be
stitching the lightning bolt (Dot-Bolt2).
We wanted to have a “pop art” screen printed effect,
so to duplicate the design in your hoop, select the
“ADD” button, or similar feature in your machine.
NOTE: Not all machines will have the same process
for merging. Consult your machine’s manual for
steps on merging or duplicating.
C D
Add as many additional designs that will fit within
your embroidery hoop.
You can use the settings on the machine to align
the placement of each design in respect to both
the x and y axis. FOR TOUCH SCREENS: You can
also drag and drop the designs into position with a
finger or appropriate stylus.
E F
Select “Embroidery” or set the design and you are
now ready to stitch.
To begin the project, hoop a piece of No-Show Mesh
stabilizer to fit.
A