G H
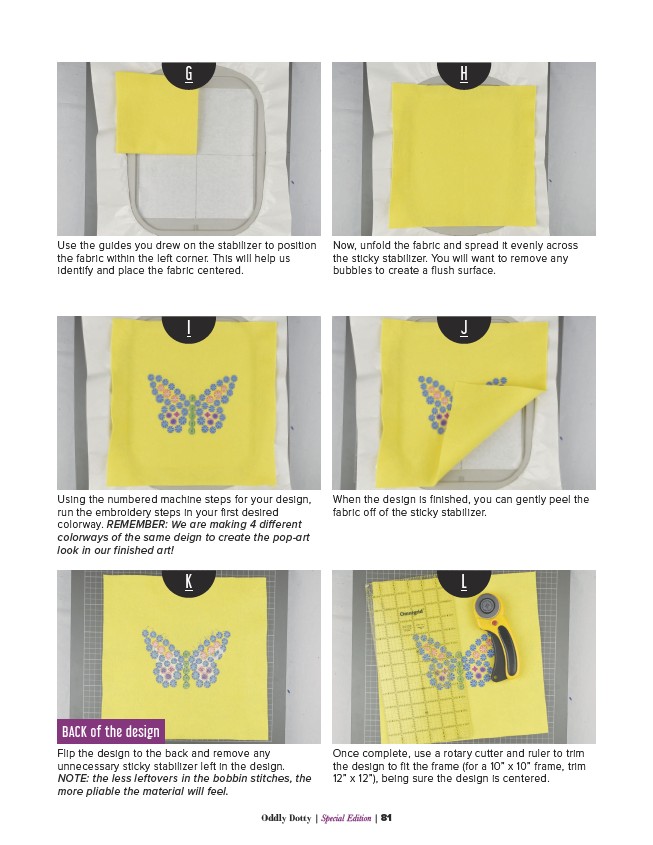
Use the guides you drew on the stabilizer to position
the fabric within the left corner. This will help us
identify and place the fabric centered.
Now, unfold the fabric and spread it evenly across
the sticky stabilizer. You will want to remove any
bubbles to create a flush surface.
I J
Using the numbered machine steps for your design,
run the embroidery steps in your first desired
colorway. REMEMBER: We are making 4 different
colorways of the same deign to create the pop-art
look in our finished art!
When the design is finished, you can gently peel the
fabric off of the sticky stabilizer.
K L
Flip the design to the back and remove any
unnecessary sticky stabilizer left in the design.
NOTE: the less leftovers in the bobbin stitches, the
more pliable the material will feel.
Once complete, use a rotary cutter and ruler to trim
the design to fit the frame (for a 10” x 10” frame, trim
12” x 12”), being sure the design is centered.
Oddly Dotty | Special Edition | 81
BACK of the design