be mine PUFFY BANNER FLAG
We’ve included the designs for letters B, E, M, I, and N to create
the “Be Mine” phrase. Follow along with these step-by-step
instructions for making one of the puffy letter flags, then stitch
them all out! When you’re finished, simply thread coordinating
twine or ribbon through the loops at the top of each flag and
string your new banner flag across an entryway, desk space,
wall, or anywhere else to surprise the sweetheart in your life!
For a master design page for all the included letters, flip ahead to
the end of these step-by-step instructions.
1 2
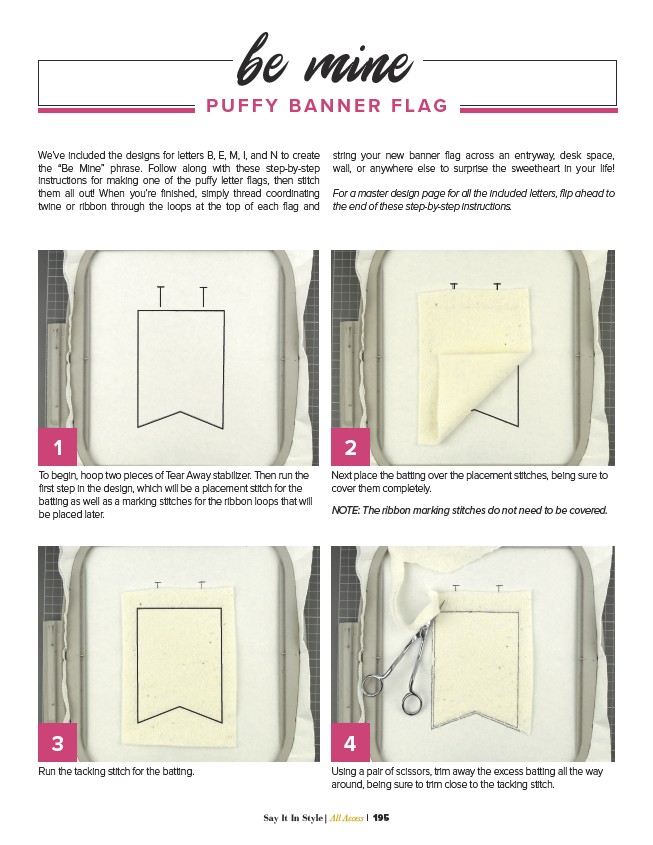
To begin, hoop two pieces of Tear Away stabilizer. Then run the
first step in the design, which will be a placement stitch for the
batting as well as a marking stitches for the ribbon loops that will
be placed later.
Next place the batting over the placement stitches, being sure to
cover them completely.
NOTE: The ribbon marking stitches do not need to be covered.
3 4
Run the tacking stitch for the batting. Using a pair of scissors, trim away the excess batting all the way
around, being sure to trim close to the tacking stitch.
Say It In Style| All Access | 195