5
4
7 6
Q R
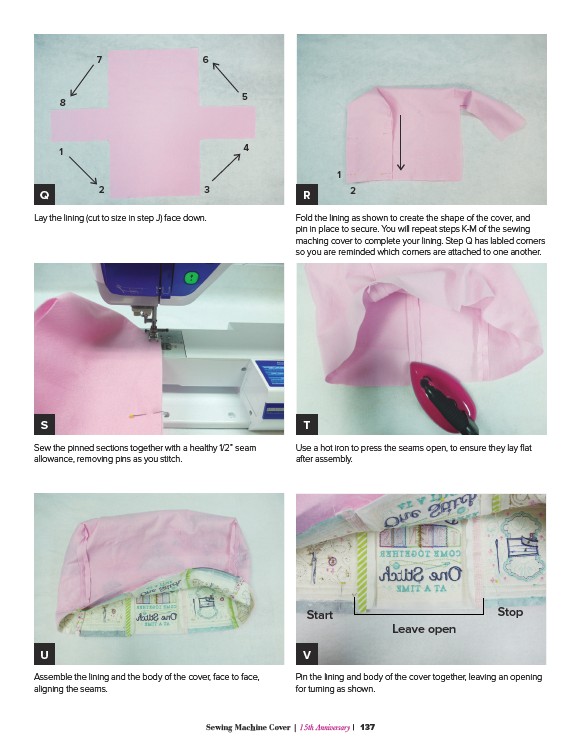
Lay the lining (cut to size in step J) face down.
S T
Sew the pinned sections together with a healthy 1/2” seam
allowance, removing pins as you stitch.
Start Stop
U V
Assemble the lining and the body of the cover, face to face,
aligning the seams.
Fold the lining as shown to create the shape of the cover, and
pin in place to secure. You will repeat steps K-M of the sewing
maching cover to complete your lining. Step Q has labled corners
so you are reminded which corners are attached to one another.
Use a hot iron to press the seams open, to ensure they lay flat
after assembly.
Leave open
Pin the lining and body of the cover together, leaving an opening
for turning as shown.
1
1
2 3 2
8
Sewing Machine Cover | �������������������������������� | 137