To start this project, you will first load the STARBURST1a design.
If you need directions on how to complete the Starburst block
of the month design, simply refer back to the tutorial within this
month’s issue of All Access. The rest is easy-peasy; simply follow
this tutorial and we will show you how to add the tacking stitch to
the design, and piece the blocks together for a variety of projects.
1 2
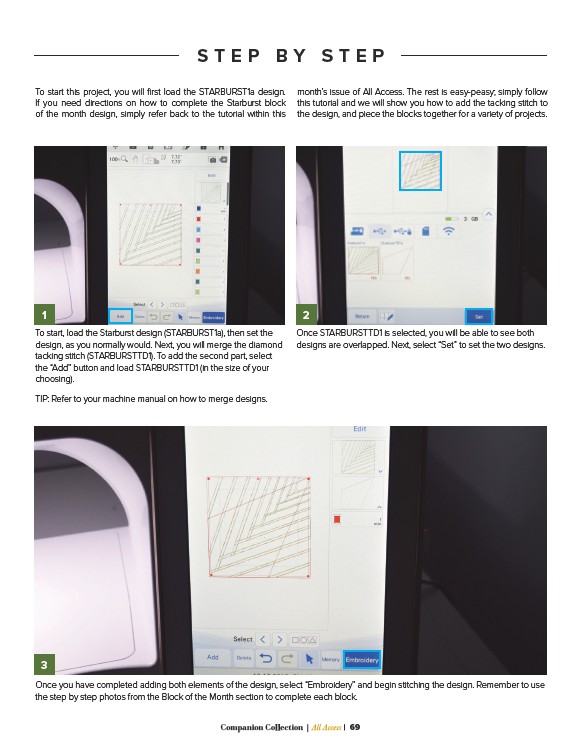
To start, load the Starburst design (STARBURST1a), then set the
design, as you normally would. Next, you will merge the diamond
tacking stitch (STARBURSTTD1). To add the second part, select
the “Add” button and load STARBURSTTD1 (in the size of your
choosing).
TIP: Refer to your machine manual on how to merge designs.
Once STARBURSTTD1 is selected, you will be able to see both
designs are overlapped. Next, select “Set” to set the two designs.
Once you have completed adding both elements of the design, select “Embroidery” and begin stitching the design. Remember to use
the step by step photos from the Block of the Month section to complete each block.
Companion Collection | All Access | 69
3
S T E P B Y S T E P