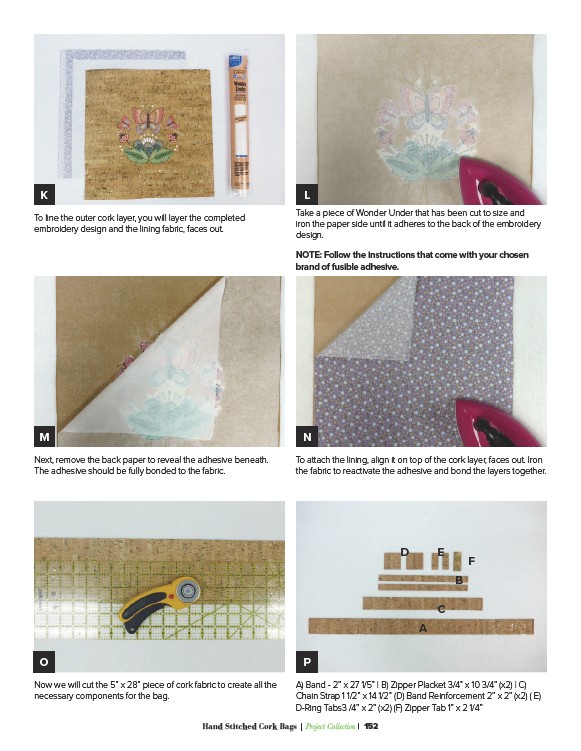
K L
To line the outer cork layer, you will layer the completed
embroidery design and the lining fabric, faces out.
M N
Next, remove the back paper to reveal the adhesive beneath.
The adhesive should be fully bonded to the fabric.
O P
Now we will cut the 5” x 28” piece of cork fabric to create all the
necessary components for the bag.
Take a piece of Wonder Under that has been cut to size and
iron the paper side until it adheres to the back of the embroidery
design.
NOTE: Follow the instructions that come with your chosen
brand of fusible adhesive.
To attach the lining, align it on top of the cork layer, faces out. Iron
the fabric to reactivate the adhesive and bond the layers together.
A) Band - 2” x 27 1/5” | B) Zipper Placket 3/4” x 10 3/4” (x2) | C)
Chain Strap 1 1/2” x 14 1/2” (D) Band Reinforcement 2” x 2” (x2) ( E)
D-Ring Tabs3 /4” x 2” (x2) (F) Zipper Tab 1” x 2 1/4”
Hand Stitched Cork Bags | ������������������������������������ | 152
A
C
F
D E
B