E F
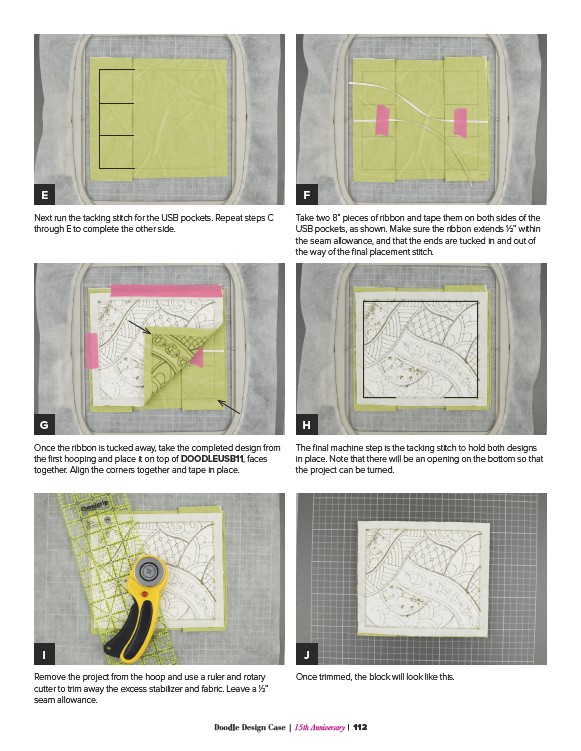
Next run the tacking stitch for the USB pockets. Repeat steps C
through E to complete the other side.
G H
Once the ribbon is tucked away, take the completed design from
the first hooping and place it on top of DOODLEUSB11, faces
together. Align the corners together and tape in place.
I J
Remove the project from the hoop and use a ruler and rotary
cutter to trim away the excess stabilizer and fabric. Leave a 1⁄2”
seam allowance.
Take two 8” pieces of ribbon and tape them on both sides of the
USB pockets, as shown. Make sure the ribbon extends ½” within
the seam allowance, and that the ends are tucked in and out of
the way of the final placement stitch.
The final machine step is the tacking stitch to hold both designs
in place. Note that there will be an opening on the bottom so that
the project can be turned.
Once trimmed, the block will look like this.
Doodle Design Case | 15th Anniversary | 112