5 6
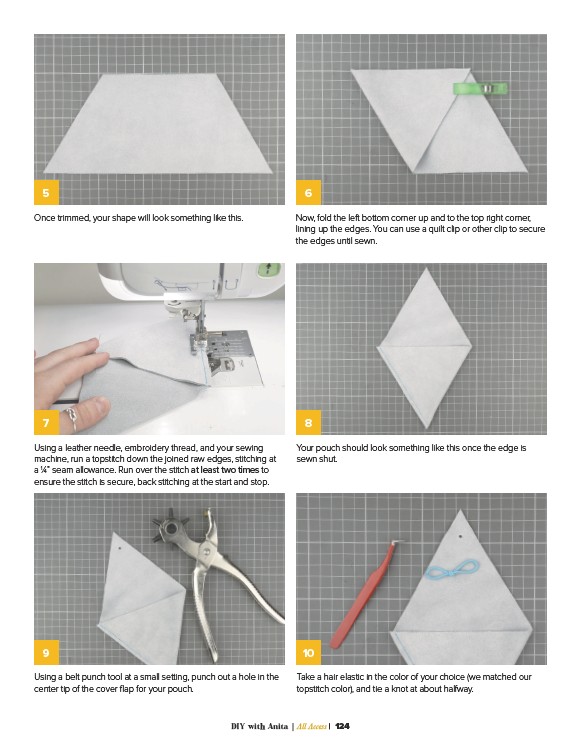
Once trimmed, your shape will look something like this.
Now, fold the left bottom corner up and to the top right corner,
lining up the edges. You can use a quilt clip or other clip to secure
the edges until sewn.
7 8
Using a leather needle, embroidery thread, and your sewing
machine, run a topstitch down the joined raw edges, stitching at
a 1⁄4” seam allowance. Run over the stitch at least two times to
ensure the stitch is secure, back stitching at the start and stop.
Your pouch should look something like this once the edge is
sewn shut.
9 10
Using a belt punch tool at a small setting, punch out a hole in the
center tip of the cover flap for your pouch.
Take a hair elastic in the color of your choice (we matched our
topstitch color), and tie a knot at about halfway.
DIY with Anita | All Access | 124