D I Y A N I TA
SNAP BUTTON INSTRUCTIONS
1 2
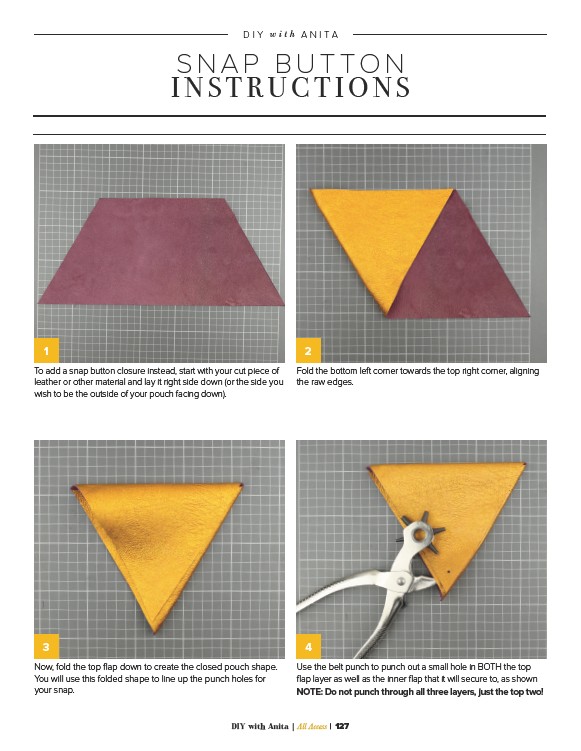
To add a snap button closure instead, start with your cut piece of
leather or other material and lay it right side down (or the side you
wish to be the outside of your pouch facing down).
3 4
Now, fold the top flap down to create the closed pouch shape.
You will use this folded shape to line up the punch holes for
your snap.
Fold the bottom left corner towards the top right corner, aligning
the raw edges.
Use the belt punch to punch out a small hole in BOTH the top
flap layer as well as the inner flap that it will secure to, as shown
NOTE: Do not punch through all three layers, just the top two!
DIY with Anita | All Access | 127