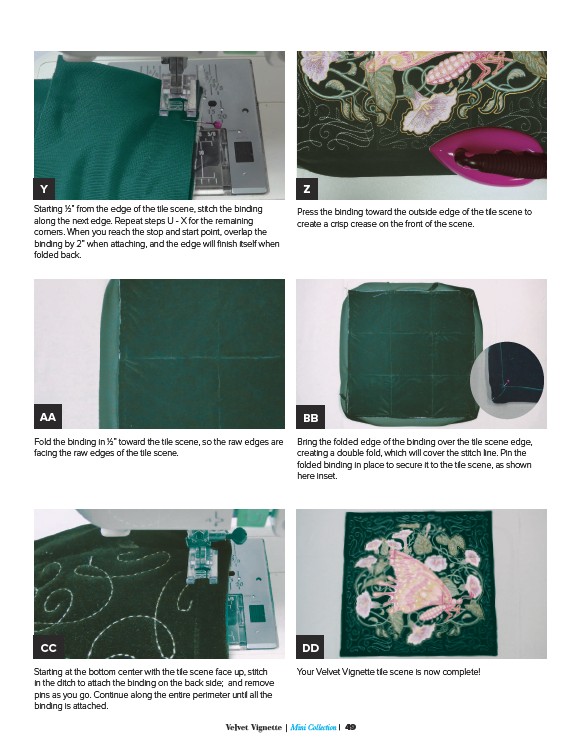
Y Z
Starting 1⁄2” from the edge of the tile scene, stitch the binding
along the next edge. Repeat steps U - X for the remaining
corners. When you reach the stop and start point, overlap the
binding by 2” when attaching, and the edge will finish itself when
folded back.
AA BB
Fold the binding in 1⁄2” toward the tile scene, so the raw edges are
facing the raw edges of the tile scene.
CC DD
Starting at the bottom center with the tile scene face up, stitch
in the ditch to attach the binding on the back side; and remove
pins as you go. Continue along the entire perimeter until all the
binding is attached.
Press the binding toward the outside edge of the tile scene to
create a crisp crease on the front of the scene.
Bring the folded edge of the binding over the tile scene edge,
creating a double fold, which will cover the stitch line. Pin the
folded binding in place to secure it to the tile scene, as shown
here inset.
Your Velvet Vignette tile scene is now complete!
Velvet Vignette | Mini Collection | 49