T I P S T R I C K S
s t e p - b y - s t e p
INSTRUCTIONS
For this Tips & Tricks tutorial, all you’ll need is a blank hat, a binder
clip, Madeira’s Frosted Matt thread, and some Peel N’ Stick
stabilizer. To really bring out the matt finish of the Frosted Matt
thread, we got a satin hat, so you can really see the difference in
depth and sheen. We got our hat from a local craft store, so any
hat will do.
1 2
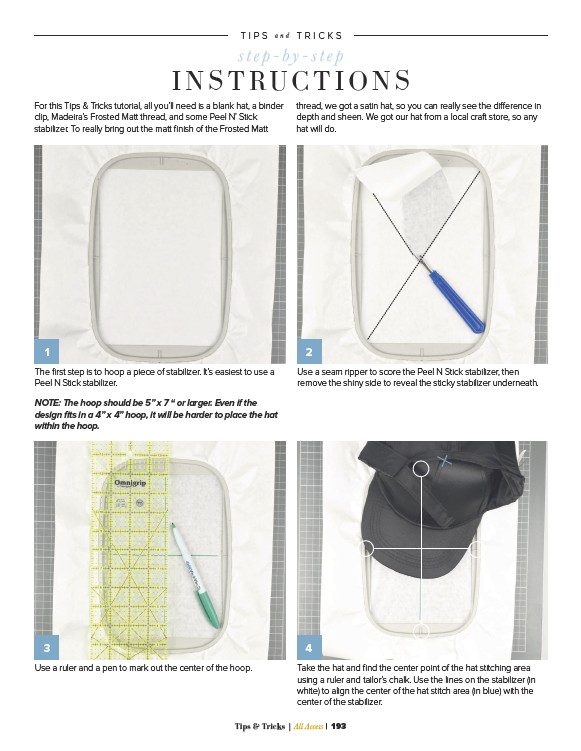
The first step is to hoop a piece of stabilizer. It’s easiest to use a
Peel N Stick stabilizer.
NOTE: The hoop should be 5” x 7 “ or larger. Even if the
design fits in a 4” x 4” hoop, it will be harder to place the hat
within the hoop.
3 4
Use a ruler and a pen to mark out the center of the hoop.
Use a seam ripper to score the Peel N Stick stabilizer, then
remove the shiny side to reveal the sticky stabilizer underneath.
Take the hat and find the center point of the hat stitching area
using a ruler and tailor’s chalk. Use the lines on the stabilizer (in
white) to align the center of the hat stitch area (in blue) with the
center of the stabilizer.
Tips & Tricks | All Access | 193