5 6
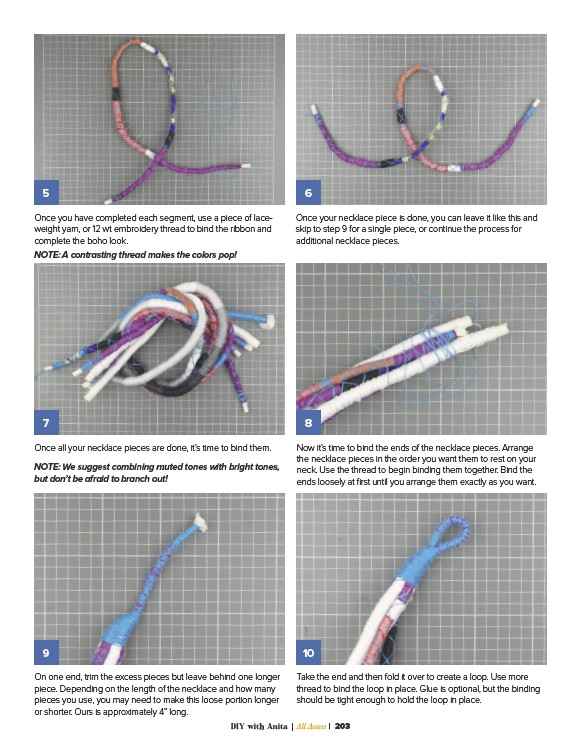
Once you have completed each segment, use a piece of laceweight
yarn, or 12 wt embroidery thread to bind the ribbon and
complete the boho look.
NOTE: A contrasting thread makes the colors pop!
Once your necklace piece is done, you can leave it like this and
skip to step 9 for a single piece, or continue the process for
additional necklace pieces.
7 8
Once all your necklace pieces are done, it’s time to bind them.
NOTE: We suggest combining muted tones with bright tones,
but don’t be afraid to branch out!
Now it’s time to bind the ends of the necklace pieces. Arrange
the necklace pieces in the order you want them to rest on your
neck. Use the thread to begin binding them together. Bind the
ends loosely at first until you arrange them exactly as you want.
9 10
On one end, trim the excess pieces but leave behind one longer
piece. Depending on the length of the necklace and how many
pieces you use, you may need to make this loose portion longer
or shorter. Ours is approximately 4” long.
Take the end and then fold it over to create a loop. Use more
thread to bind the loop in place. Glue is optional, but the binding
should be tight enough to hold the loop in place.
DIY with Anita | All Access | 203