G H
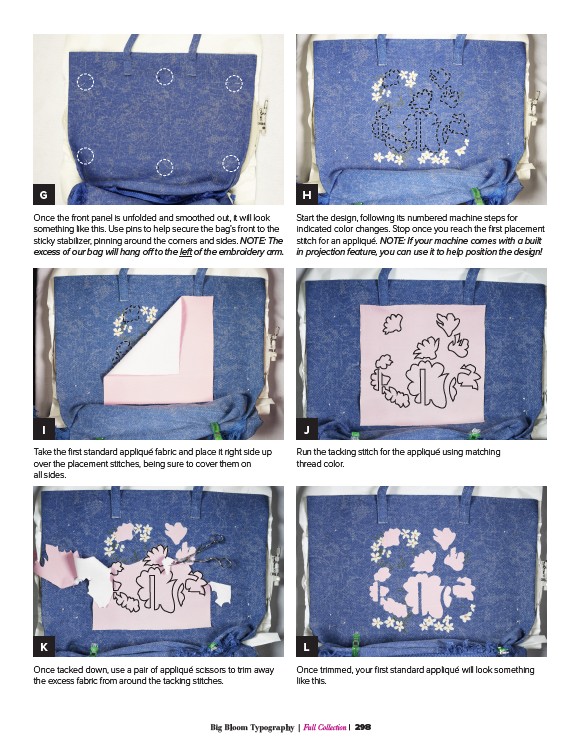
Once the front panel is unfolded and smoothed out, it will look
something like this. Use pins to help secure the bag’s front to the
sticky stabilizer, pinning around the corners and sides. NOTE: The
excess of our bag will hang off to the left of the embroidery arm.
Take the first standard appliqué fabric and place it right side up
over the placement stitches, being sure to cover them on
all sides.
Start the design, following its numbered machine steps for
indicated color changes. Stop once you reach the first placement
stitch for an appliqué. NOTE: If your machine comes with a built
in projection feature, you can use it to help position the design!
J
L
Big Bloom Typography | Full Collection | 298
I
Run the tacking stitch for the appliqué using matching
thread color.
K
Once tacked down, use a pair of appliqué scissors to trim away
the excess fabric from around the tacking stitches.
Once trimmed, your first standard appliqué will look something
like this.