D I Y A N I TA
STEP-BY-STEP INSTRUCTIONS
1 2
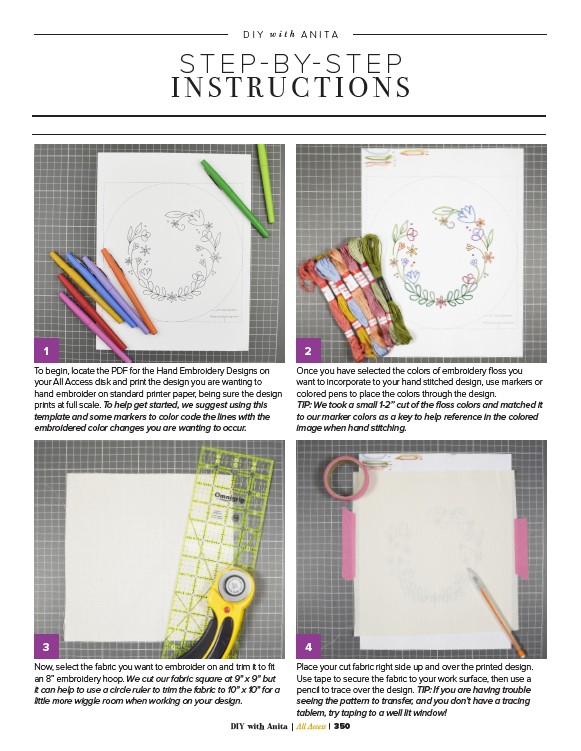
To begin, locate the PDF for the Hand Embroidery Designs on
your All Access disk and print the design you are wanting to
hand embroider on standard printer paper, being sure the design
prints at full scale. To help get started, we suggest using this
template and some markers to color code the lines with the
embroidered color changes you are wanting to occur.
3 4
Now, select the fabric you want to embroider on and trim it to fit
an 8” embroidery hoop. We cut our fabric square at 9” x 9” but
it can help to use a circle ruler to trim the fabric to 10” x 10” for a
little more wiggle room when working on your design.
Once you have selected the colors of embroidery floss you
want to incorporate to your hand stitched design, use markers or
colored pens to place the colors through the design.
TIP: We took a small 1-2” cut of the floss colors and matched it
to our marker colors as a key to help reference in the colored
image when hand stitching.
Place your cut fabric right side up and over the printed design.
Use tape to secure the fabric to your work surface, then use a
pencil to trace over the design. TIP: If you are having trouble
seeing the pattern to transfer, and you don’t have a tracing
tablem, try taping to a well lit window!
DIY with Anita | All Access | 350