M N
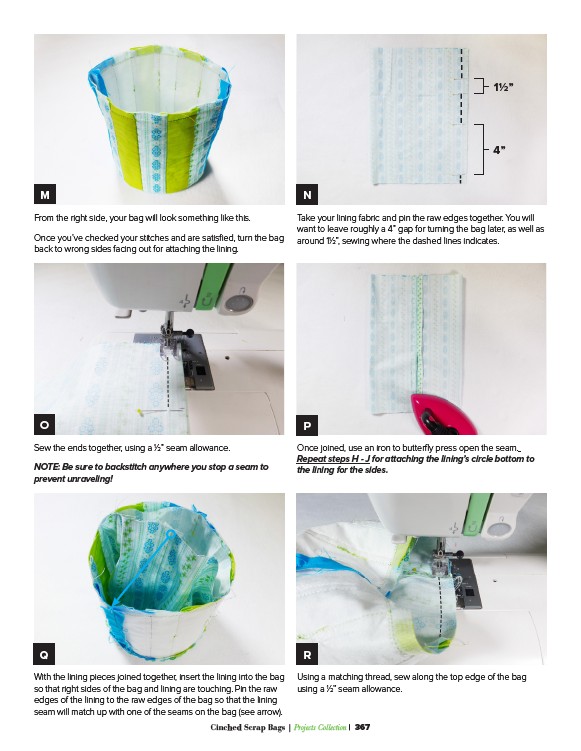
From the right side, your bag will look something like this.
Once you’ve checked your stitches and are satisfied, turn the bag
back to wrong sides facing out for attaching the lining.
O P
Sew the ends together, using a 1/2” seam allowance.
NOTE: Be sure to backstitch anywhere you stop a seam to
prevent unraveling!
Q R
With the lining pieces joined together, insert the lining into the bag
so that right sides of the bag and lining are touching. Pin the raw
edges of the lining to the raw edges of the bag so that the lining
seam will match up with one of the seams on the bag (see arrow).
Take your lining fabric and pin the raw edges together. You will
want to leave roughly a 4” gap for turning the bag later, as well as
around 11/2”, sewing where the dashed lines indicates.
Once joined, use an iron to butterfly press open the seam.
Repeat steps H - J for attaching the lining’s circle bottom to
the lining for the sides.
Using a matching thread, sew along the top edge of the bag
using a 1/2” seam allowance.
Cinched Scrap Bags | Projects Collection | 367
11/2”
4”